
How to Use a 3 Gallon Air Compressor: Practical Setup and Operation Guide for 2026
Master how to use a 3 gallon air compressor safely in October 2026 with step-by-step guidance on pressure regulators, tool CFM limits, and daily moisture draining.
 By Tom Scalisi
Updated October 8, 2026
By Tom Scalisi
Updated October 8, 2026
Pneumatic tools deliver instant driving power for trim carpentry, tire maintenance, and workshop cleanup, but compact air tanks require specific operating habits to avoid motor burnout and sudden pressure drops. Learning how to use a 3 gallon air compressor allows you to maximize the utility of compact pancake or hot dog tanks while protecting internal pump components. These compact units, ranging from oil-free pancake models by Ironton and ECOMAX to ultra-quiet induction systems, store pressurized air in a portable footprint. Proper setup ensures that your air hose connections remain airtight and your pneumatic tools receive steady line pressure without stalling the motor.
Operating a compact compressor safely requires understanding how the regulator knob controls airflow compared to the main tank pressure gauge. You also need to balance tool demand against the continuous output of an oil-free pump to avoid thermal shutdowns during demanding jobs. Regular moisture draining through the underside tank valve protects the steel reservoir against premature corrosion and keeps water out of your air lines. With the right startup routine and basic maintenance, a 3-gallon setup delivers reliable pneumatic power across dozens of household and garage tasks.
| Award | Product | ACR Score About ACR ScoreThe ACR Score is our own rating from 0 to 10, based on performance, design and build, ease of use, and value. It reflects independent research and is never influenced by manufacturers, retailers, or affiliate commissions. Learn more › | |
|---|---|---|---|
| Best Overall |
Limodot 8-Gallon Quiet Air Compressor
|
9.1/10 | Buy |
| Best Premium |
 CNRAQR 3-Gallon Aluminum Air Tank and 200 PSI
|
9.1/10 | Buy |
| Best Value |
 ECOMAX 3-Gallon Portable Pancake Air Compressor
|
8.8/10 | Buy |
| Best Budget |
 Ironton 3-Gallon Oil-Free Pancake Air Compressor
|
8.6/10 | Buy |
 FORNAX 3 Gallon Portable Air Compressor with Kits
|
8.0/10 | Buy | |
 CNRAQR 3 Gallon Air Tank with 150PSI Air
|
8.0/10 | Buy | |
 FORNAX 3-Gallon Pancake Air Compressor
|
7.8/10 | Buy | |
 Baococo 3-Gallon Ultra Quiet Air Compressor
|
7.8/10 | Buy |
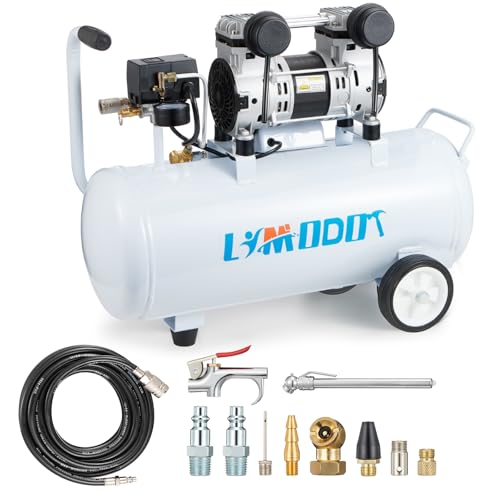
Limodot 8-Gallon Quiet Air Compressor
Limodot pairs an 8-gallon capacity with a quiet 68-decibel motor, keeping noise disruption low during indoor trim or workshop jobs. Delivering 2.8 CFM at 90 PSI alongside a quick 30-second recovery time, it provides steady airflow for DIY pneumatic tools without messy oil maintenance.
Pros
- Low 68 dB output prevents loud workshop disruption
- Fast 30-second pressure recovery keeps projects moving
- Oil-free pump eliminates messy oil changes
- Comprehensive 11-piece accessory kit included out of the box
- Integrated wheels make moving the 8-gallon tank easy
Cons
- 2.8 CFM output limits high-demand continuous tools
- Included PVC hose is stiffer than rubber alternatives
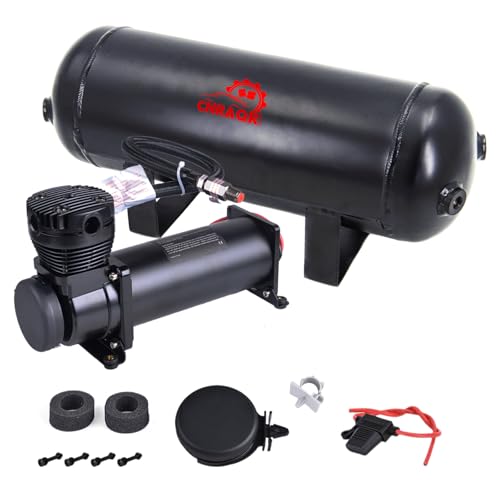
CNRAQR 3-Gallon Aluminum Air Tank and 200 PSI
The CNRAQR Onboard Air System pairs a 200 PSI compressor with a 3-gallon anodized aluminum tank, creating a dependable pneumatic reservoir for air ride suspensions and truck horns. Engineered with an IP67 weather resistance rating and thermal overload protection, it is an ideal setup for automotive fabricators and truck owners.
Pros
- Lightweight anodized aluminum tank reduces overall vehicle payload while fighting moisture corrosion.
- High 200 PSI maximum pressure ceiling stores ample pneumatic energy for air horns and helper bags.
- IP67 rating provides protection against dust and water in harsh underbody vehicle environments.
- Includes a 30A waterproof fuse and thermal overload protection to guard against electrical strain.
- Standard 1/4-inch NPT threaded fittings simplify integration with aftermarket pneumatic accessories.
Cons
- Duty cycle is restricted to partial throttle operation when pushing near the 200 PSI maximum limit.
- Engineered for 12V automotive onboard systems rather than standard 120V household garage tool outlets.
- Compact 3-gallon reservoir is not sized to run continuous air tools like rotary sanders or paint guns.
ECOMAX 3-Gallon Portable Pancake Air Compressor
Delivering 0.6 SCFM at 90 PSI with a 110 max PSI 3-gallon tank, this ultra-lightweight 16.3-pound pancake compressor is built for light-duty DIY tasks and tire inflation. It provides a convenient, low-maintenance air source complete with an 11-piece accessory kit for homeowners and hobbyists.
Pros
- Extremely lightweight at only 16.3 pounds with a balanced flip-up carry handle for easy mobility
- Generous 11-piece accessory pack provides immediate utility for tire filling, blow-off tasks, and air connections
- Oil-free pump design ensures simple, maintenance-free operation for casual home users
- Dual quick-connect couplers allow flexible setups without needing aftermarket splitters
Cons
- Rated airflow delivery of 0.6 SCFM at 90 PSI is strictly limited to intermittent fastening and inflation
- Maximum pressure threshold of 110 PSI provides less air reserve than larger 150-165 PSI contractor compressors
- Not suitable for continuous high-demand air tools like paint sprayers, sanders, or heavy impact wrenches
Ironton 3-Gallon Oil-Free Pancake Air Compressor
The Ironton 3-Gallon Oil-Free Pancake Air Compressor combines a 0.3 HP motor and 110 PSI max pressure with an ultra-portable 20.6-pound frame and fold-down handle. It is a practical, low-maintenance option for DIY homeowners and hobbyists handling light brad nailing, stapling, and tire inflation.
Pros
- Lightweight 20.6-pound build with a fold-down carry handle makes one-handed portability nearly effortless
- Wide pancake base delivers outstanding stability with a low center of gravity to prevent tipping
- Zero-maintenance oil-free pump means clean discharge air and no messy oil changes
- Protective shroud includes convenient molded wraps for both the power cord and air hose
- Large regulator knob and quick-connect coupler allow fast, intuitive line adjustments
Cons
- Modest 0.3 HP motor and 110 PSI ceiling cannot support continuous high-CFM air tools like sanders or sprayers
- 3-gallon capacity requires occasional recovery pauses during rapid fastener firing
- Bare-tool setup does not include an air hose, tire chuck, or pneumatic nailer out of the box
FORNAX 3-Gallon Pancake Air Compressor
Built for quick household inflations and light pneumatic jobs, this compact unit features an oil-free pump that requires minimal upkeep. At under 20 pounds, it is exceptionally easy to carry, though its low air delivery restricts it to lighter-duty tasks.
Pros
- Low-maintenance oil-free pump mechanism
- Very lightweight and easy to transport
- Compact pancake footprint saves garage space
- Sufficient 110 PSI pressure for basic tasks
Cons
- High noise output rated at 89 dB(A)
- Limited air delivery of 0.8 CFM at 90 PSI
- Lower 110 PSI ceiling than typical workshop compressors
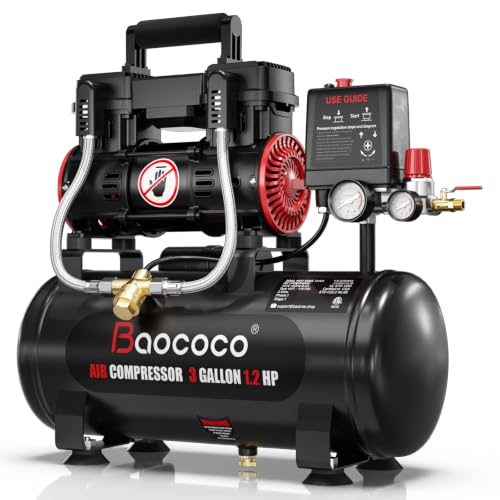
Baococo 3-Gallon Ultra Quiet Air Compressor
The Baococo 3-Gallon Ultra Quiet Air Compressor delivers up to 115 PSI at approximately 70dB, powered by a 1.2HP copper motor and an oil-free pump. With a 20-second recovery cycle, dual quick couplers, and integrated transport wheels, it is a practical, budget-friendly choice for indoor trim work, DIY repairs, and garage tire maintenance.
Pros
- Operates at roughly 70dB, allowing conversation and indoor use without deafening noise
- Rapid 20-second tank recovery cycle helps keep intermittent nailing projects moving
- Dual quick-connect couplers allow quick tool changes or running two air lines at once
- Built-in wheels and sturdy carry handle make rolling or lifting across the workspace easy
- Oil-free pump eliminates messy crankcase checks and prevents oil leaks during vehicle transport
Cons
- Maximum tank pressure tops out at 115 PSI, lower than 135 to 175 PSI contractor-grade units
- Manufacturer does not publish continuous CFM at 90 PSI, making it unsuited for continuous air tools like sanders or grinders
- Compact 3-gallon air reserve requires frequent motor cycling under rapid pneumatic demand
Essential Operating Guide for 3-Gallon Air Compressors
Operating a 3-gallon air compressor effectively requires understanding the balance between stored pressure and continuous air delivery. While larger shop compressors can run air-hungry sanders indefinitely, a compact 3-gallon machine serves primarily as an energy buffer for intermittent pneumatic tools. Mastering your unit involves disciplined pre-start checks, precise regulator tuning, and consistent tank drainage routines that preserve the motor and pressure vessel for years of reliable service.
Understanding Tank Capacity and Air Delivery Limits
A 3-gallon pressure vessel holds compressed air typically pressurized between 110 PSI and 115 PSI, functioning as a temporary reservoir rather than a continuous power station. The pump motor runs until this storage threshold is reached, then shuts down until line pressure drops during tool operation. Understanding this distinction prevents you from expecting industrial performance from a compact utility machine. The volume stored in a 3-gallon tank provides just enough buffer to drive fasteners or inflate vehicle tires without demanding constant motor operation.
Air delivery output, measured in cubic feet per minute (CFM) at 90 PSI, defines which tools your compressor can realistically support. Compact oil-free compressors, such as models from Ironton or FORNAX, typically generate between 0.6 CFM and 0.8 CFM at 90 PSI. This air volume matches intermittent tools like 18-gauge brad nailers, pin nailers, and pneumatic staplers that consume brief pulses of air. In contrast, continuous tools like dual-action sanders, die grinders, or HVLP paint sprayers consume 6 to 12 CFM, which will drain a 3-gallon tank in seconds and cause the motor to run continuously.
Pre-Operation Inspection and Safety Valve Testing
Every operating session should begin with a visual inspection of the compressor housing, rubber feet, and pneumatic connections. Ensure that the plastic shroud is intact and that no electrical cords show signs of fraying or cracked insulation. Verify that the bottom moisture drain valve is fully closed before you attempt to pressurize the vessel. Operating with an open or partially seated drain valve forces the motor to pump air directly into the room, causing unnecessary wear and preventing pressure buildup.
Testing the ASME safety relief valve ring is a crucial safety habit before introducing electrical power. The safety valve features a brass pull-ring connected to an internal spring that vents excessive pressure if the automatic pressure switch malfunctions. Gently tug the metal pull-ring outward to confirm that the internal valve stem moves freely against spring tension. Never operate any pneumatic compressor if the safety relief valve is stuck, corroded, or tampered with, as an unvented pressure spike creates a dangerous mechanical hazard.
Managing Electrical Circuits and Extension Cord Limits
Electric air compressors draw substantial electrical current during the initial motor startup phase. While running amperage on a small 0.3 HP to 1.2 HP motor typically remains manageable, the initial startup surge can easily double the operating load for several seconds. Plugging the unit into a shared 15-amp household circuit that already powers garage freezers, heaters, or work lights frequently trips the breaker. Whenever possible, dedicate a standard 120-volt grounded outlet to the compressor while it runs.
Using light-gauge extension cords creates severe electrical resistance that drops operating voltage at the motor terminals. When voltage drops, the compressor motor struggles to overcome internal cylinder head pressure, leading to loud humming and tripped thermal overload switches. If you need extended working reach on a jobsite, connect the compressor directly to a wall receptacle and use a longer 25-foot or 50-foot air hose instead. Adding extra pneumatic hose length eliminates electrical voltage drop entirely while maintaining full working pressure at your tool.
Reading the Dual-Gauge Manifold and Setting Pressure
A standard 3-gallon compressor manifold features two distinct pressure gauges positioned beside the air outlet. The tank pressure gauge shows the raw pressure stored directly inside the 3-gallon reservoir, climbing toward the maximum cutoff threshold of 110 PSI or 115 PSI during pumping. The regulated pressure gauge indicates the specific downstream pressure delivered through the quick-connect coupler into your hose. Monitoring both gauges helps you diagnose air leaks and track pump cycling performance during long projects.
Setting the correct working pressure requires adjusting the oversized regulator knob located on the manifold console. Turning the knob clockwise compresses an internal regulator spring, raising downstream pressure toward your pneumatic tool. Turning the knob counterclockwise relaxes the spring to lower delivered pressure. To establish an accurate operating setting, adjust the knob while momentarily firing your air tool or depressing your inflator chuck, ensuring the gauge reflects dynamic working pressure rather than static line pressure.
Connecting Air Hoses with Quick-Connect Couplers
Most 3-gallon compressors utilize universal 1/4-inch NPT quick-connect industrial couplers on the manifold discharge port. Connecting an air hose involves pulling back the knurled brass outer sleeve on the female coupler, sliding the male plug into the opening, and releasing the collar. Listen for an audible snap as the locking balls inside the coupler engage the plug shoulder. Tug firmly on the hose to verify that the joint is locked securely before turning the regulator knob open.
Threaded connections between couplers, manifolds, and accessory fittings must be sealed properly to prevent slow pressure leaks. If you swap fittings or attach custom tire chucks, wrap male threads with two to three layers of PTFE thread seal tape applied in a clockwise direction. Leaking connections waste compressor energy, force the motor to cycle while tools sit idle, and shorten pump lifespan. You can check suspicious connections by brushing a mild soap-and-water solution over joints, watching for expanding bubbles that pinpoint escaping air.
Starting the Unit and Observing the Pressurization Cycle
Place the compressor on a flat, level surface where the rubber isolation feet make solid contact with the floor. Ensure the power switch rests in the off position before inserting the three-prong plug into a grounded outlet. Move the power switch to the auto or on setting to engage the electric motor and begin the compression cycle. The pump will immediately begin drawing atmospheric air through the intake filter, compressing it into the 3-gallon reservoir.
As air builds inside the tank, watch the tank gauge needle rise steadily toward the factory cut-off threshold. Once internal pressure reaches 110 PSI, the integrated pressure switch automatically interrupts electrical power to stop the motor. At the exact moment of motor shutdown, you will hear a brief, sharp hiss of air from the unloader valve. This sound indicates that the unloader has successfully vented trapped head pressure between the pump cylinder and check valve, preparing the motor for an unhindered restart.
The compressor will remain silent until your air tool discharges enough pressure to drop the tank needle to the cut-in threshold, usually around 85 PSI. Once that lower pressure limit is crossed, the pressure switch contacts close automatically, re-engaging the motor to refill the tank. Recovery time from cut-in to cut-out usually takes 20 to 40 seconds depending on pump design. Understanding this automatic cycle allows you to pace your work so the machine never runs out of usable operating pressure.
Configuring Operating Pressures for Different Pneumatic Tasks
Fastening tools like brad nailers and narrow-crown staplers require moderate, carefully controlled line pressure to drive fasteners cleanly without damaging workpieces. An 18-gauge brad nailer generally operates between 70 PSI and 90 PSI depending on wood hardness. Adjust your regulator knob until test fasteners sink flush into scrap material without leaving driver indentations on delicate surfaces. Operating a nailer at excessive line pressure causes premature bumper wear, driver blade damage, and severe workpiece marring.
Tire inflation demands accurate regulator adjustment paired with a dedicated tire pressure gauge. Set the compressor regulator slightly above the target tire specification, typically around 40 PSI to 45 PSI for standard passenger car tires. Lock the tire chuck securely onto the valve stem and add air in brief five-second bursts, pausing to verify pressure with an independent tire gauge. Never rely solely on the compressor manifold gauge to measure final tire pressure, as line friction and hose restriction can distort readings.
Air blow guns used for cleaning sawdust and garage debris should be dialed down to approximately 30 PSI for safety and control. High-pressure air blasts can launch metal shavings and wood chips dangerously across an enclosed workspace. Using an OSHA-compliant blow nozzle with side relief ports ensures that static backpressure remains safe if the nozzle tip becomes obstructed. Regulating airflow downward also conserves stored tank volume, extending your blowing time before the motor needs to cycle.
Managing Pump Duty Cycles and Preventing Overheating
Most portable 3-gallon air compressors utilize oil-free pumps with Teflon-coated piston rings moving inside aluminum cylinders. While oil-free construction eliminates fluid maintenance and allows easy transport without oil spills, it relies entirely on ambient air for cooling. Manufacturers design these compact pumps for an intermittent duty cycle, typically rated at 50 percent. This means the pump motor should rest for at least as much time as it spends actively compressing air during an extended session.
Pushing a compact compressor beyond its duty cycle causes excessive heat buildup inside the cylinder head and valve plate assembly. If thermal thresholds are exceeded, the built-in thermal overload protection switch will trip, shutting off electrical power to prevent motor burnout. If your compressor suddenly shuts down and refuses to restart, turn the power switch off and unplug the power cord immediately. Allow the pump housing to cool down for twenty to thirty minutes before pressing the red thermal reset button on the motor housing.
Depressurizing the System and Draining Moisture Daily
Atmospheric air contains natural humidity that enters the compressor cylinder during every intake stroke. As the piston compresses incoming air, heat rises, and moisture condenses into liquid water as the stored air cools inside the steel tank. This liquid condensation pools at the lowest point of the 3-gallon vessel, creating an environment that causes internal rust and scale buildup. Draining accumulated water at the end of every working day is the single most important maintenance step you can take.
To drain the tank safely, switch the power toggle to off and unplug the compressor from the wall outlet. Turn the pressure regulator knob counterclockwise until downstream line pressure reads zero, then disconnect your air hose from the quick-connect coupler. Pull the safety relief valve ring gently to vent stored tank pressure down below 20 PSI so air does not blast violently out of the drain port. Controlled pressure venting prevents high-velocity debris ejection when you open the bottom drain mechanism.
Locate the drain valve on the bottom of the tank, which is typically a threaded brass thumb petcock or a quarter-turn lever valve. Slowly open the valve while tilting the compressor slightly toward the drain port, allowing rusty water and pressurized air to spray out into a rag or catch basin. Once the moisture spray stops and only dry air escapes, close the valve securely by hand. Leaving the drain valve slightly open during seasonal storage keeps internal steel surfaces dry and prevents condensation buildup.
Troubleshooting Common Operation and Cycling Problems
If the compressor motor hums loudly without spinning when pressure drops to the cut-in point, trapped head pressure is the most common cause. When the unloader valve fails to release air between the pump cylinder and tank check valve, the motor must start against full backpressure. You can resolve this issue by switching the unit off, draining the tank completely, and allowing the unloader mechanism to seat properly. Checking that your outlet delivers full voltage without an extension cord also resolves stubborn motor humming.
A continuous hissing sound escaping from the unloader valve after the motor stops running points to a leaking in-tank check valve. The brass check valve is designed to let air flow into the tank while preventing pressurized air from traveling backward into the pump head. If dirt or carbon particles lodge under the check valve flapper, tank air bleeds backward and exhausts through the unloader port. Cleaning or replacing the brass check valve flapper restores an airtight seal and prevents unloader bleeding.
Sluggish tank pressurization and abnormally long recovery intervals usually indicate an airflow restriction or worn piston seals. Inspect the foam or paper intake air filter threaded into the cylinder head, as heavy sawdust buildup chokes incoming air volume. Clean or replace clogged filter elements to restore proper airflow into the compression chamber. If recovery times remain sluggish after filter cleaning, inspect hose connections, manifold fittings, and pressure relief rings for subtle air leaks.
Safe Storage, Transport, and Routine Maintenance
Compact 3-gallon compressors feature integrated top carry handles and molded cord wraps that simplify storage and jobsite transport. Always empty the air tank completely before lifting the machine into a vehicle trunk or truck bed. Transporting a fully pressurized air tank exposes the manifold assembly and relief valves to impact damage that could trigger an uncontrolled pressure release. Secure the machine upright with tie-down straps so it cannot roll or strike other heavy tools during transit.
Store your compressor indoors in a clean, temperature-controlled environment away from freezing weather and excessive workshop humidity. Extreme cold thickens grease inside motor bearings and causes rubber unloader seals to stiffen, leading to difficult winter starts. Wipe down the outer shroud and motor cooling vents regularly to prevent dust accumulation that could hinder heat dissipation. Inspect the rubber isolation feet periodically and tighten loose fasteners to keep operating vibrations damp and stable.
Mastering the operation of a 3-gallon air compressor comes down to respecting its volume boundaries and maintaining clean, dry air delivery. By checking the safety valve before each run, dialing your regulator to tool-specific pressures, and purging tank moisture daily, you protect both your equipment and your projects. This disciplined approach ensures that your compact pneumatic system delivers dependable, safe, and efficient power whenever household repairs or woodworking tasks demand it.
About the author
Tom Scalisi brings more than two decades of experience in construction, building maintenance, contracting, and hands-on tool use. His practical understanding of power tools, automotive work, repairs, and jobsite equipment helps readers evaluate compressors based on real workloads rather than specifications alone.