
How to Set up Air Compressor Hose: Step-by-Step Setup Guide for 2026
Learn how to set up air compressor hose connections with proper thread sealing, couplers, and fittings for reliable pneumatic power in October 2026.
 By Kenny Koehler
Updated October 7, 2026
By Kenny Koehler
Updated October 7, 2026

Pressurized air systems rely on solid, leak-free plumbing to deliver stable working pressure to pneumatic fasteners, impact wrenches, and tire chucks. Connecting a fresh pneumatic line directly to a tank regulator requires understanding how thread standards, couplers, and proper sealing tape interact under line pressure. Knowing exactly how to set up air compressor hose prevents sudden pressure drops, persistent hissing leaks, and potential safety hazards caused by poorly secured hardware. A properly assembled pneumatic air line also optimizes air compressor CFM delivery by maintaining an unrestricted bore from the manifold to your chosen pneumatic tool.
Most workshop setups rely on standard 1/4-inch NPT fittings, quick-connect industrial couplers, and flexible rubber or polyurethane lines rated between 120 and 300 PSI. Threading male plugs into tool bases, wrapping pipe threads correctly, and securing quick couplers to hose ends ensures smooth operation without continuous pump cycling. Taking a few deliberate minutes to prep your fittings and verify seals prevents common garage frustrations and keeps your pneumatic tools operating at steady pressure.
| Award | Product | ACR Score About ACR ScoreThe ACR Score is our own rating from 0 to 10, based on performance, design and build, ease of use, and value. It reflects independent research and is never influenced by manufacturers, retailers, or affiliate commissions. Learn more › | |
|---|---|---|---|
| Best Overall |
SARDVISA 22-Piece Kit with 25-Ft PU Hose
|
9.2/10 | Buy |
| Best Budget |
 YOTOO 1/4-Inch x 25-Foot Polyurethane Recoil Air
|
9.2/10 | Buy |
 Ticexaw 22-Piece 1/4-Inch NPT Air Hose Kit
|
8.8/10 | Buy | |
| Best Value |
 FYPower 18-Piece Air Compressor Kit
|
8.8/10 | Buy |
 FYPower 18-Piece Air Compressor Accessories Kit
|
8.6/10 | Buy | |
 WYNNsky 3/8-Inch x 25ft PVC Air Hose Kit
|
8.4/10 | Buy | |
| Best Premium |
 FYPower 22-Piece Air Compressor Accessory Kit
|
8.4/10 | Buy |
 FYPower 22-Piece 25ft Air Compressor Kit
|
8.4/10 | Buy | |
 Harrier Hardware 11-Piece Air Compressor Starter
|
8.3/10 | Buy | |
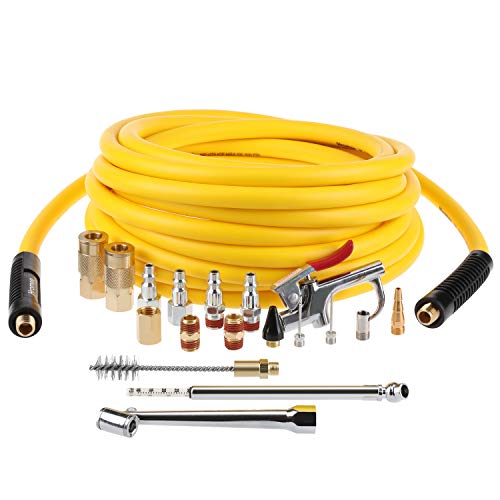 Hromee 19-Piece 25-Foot Air Compressor Kit
|
8.3/10 | Buy |
SARDVISA 22-Piece Kit with 25-Ft PU Hose
This 22-piece accessory bundle equips home garages and workshops with standard 1/4-inch NPT fittings, dual chucks, and a metal blow gun. Its standout component is a 25-foot coiled PU hose featuring detachable ends that allow easy trimming and repair if damaged.
Pros
- Repairable PU hose design saves replacement costs
- Comprehensive 22-piece selection for inflation and cleaning
- Sturdy metal blow gun supports high air capacity
- Universal 1/4-inch NPT fittings ensure wide compatibility
Cons
- Recommended working pressure is capped at 120 PSI
- Coiled spring hose can limit practical working reach
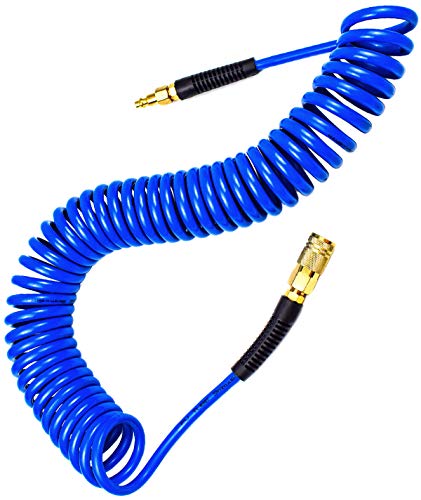
YOTOO 1/4-Inch x 25-Foot Polyurethane Recoil Air
The YOTOO 1/4-inch by 25-foot polyurethane recoil air hose provides a lightweight, tangle-resistant pneumatic connection rated for up to 150 PSI. Equipped with pre-installed 1/4-inch industrial quick-connect fittings and flexible operation down to -40 degrees Fahrenheit, it is a convenient, space-saving accessory for garage hobbyists, trim carpenters, and workbench setups.
Pros
- Self-retracting coil design eliminates manual hose winding and prevents messy shop floor clutter
- Comes ready to work with factory-installed 1/4-inch industrial quick-connect coupler and plug
- Retains pliability in freezing conditions down to -40 degrees Fahrenheit
- Durable bend restrictors protect high-wear junction points from premature cracking or kinking
- Lightweight polyurethane build significantly minimizes hand and wrist fatigue during detailed tool work
Cons
- 1/4-inch inner diameter restricts airflow volume required for continuous high-demand tools like dual-action sanders or spray guns
- Coil tension increases when stretched near the full 25-foot reach, which can pull back against lightweight pneumatic tools
- Not intended for severe rough-framing jobsite abuse where heavy-duty reinforced rubber hoses are typically preferred
Ticexaw 22-Piece 1/4-Inch NPT Air Hose Kit
This comprehensive accessory bundle equips home compressors with an abrasion-resistant 25-foot polyurethane hose, inflation fittings, and a metal blow gun. It provides a convenient, all-in-one solution for DIY tire upkeep, inflatables, and workshop dust clearing.
Pros
- Comprehensive starter set for everyday workshop pneumatic tasks
- Flexible, kink-resistant polyurethane hose construction
- Universal 1/4-inch NPT fittings ensure broad compatibility
- Durable metal body on the air blow gun
Cons
- 25-foot hose length restricts reach across larger workspaces
- Designed for general DIY rather than heavy industrial duty
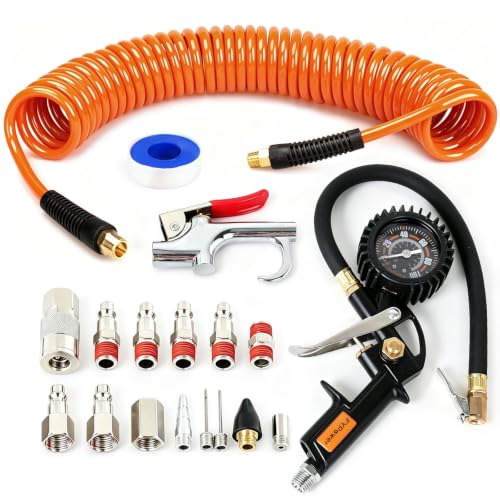
FYPower 18-Piece Air Compressor Kit
This 18-piece accessory package pairs a 25-foot recoil hose with solid brass fittings, an inflation gauge, and multiple blow gun tips. It provides personal and professional mechanics with a versatile set of corrosion-resistant connection hardware for daily air tool tasks.
Pros
- Comprehensive 18-piece assortment covers basic air tasks
- Solid brass fittings and steel couplers resist rust
- Recoil hose design stays tidy during use
- Includes thread sealing PTFE tape in the box
Cons
- Hose pressure capacity is limited to 120 PSI
- Tire gauge readout caps at 100 PSI
FYPower 18-Piece Air Compressor Accessories Kit
The FYPower 18-Piece Air Compressor Accessories Kit combines a 25-foot recoil poly hose rated at 120 PSI with standard Industrial Type M brass and steel fittings, a 100 PSI tire gauge, and multi-tip blow gun attachments. It serves as an accessible starter set for garage DIYers and homeowners handling benchtop cleanups and routine tire maintenance.
Pros
- Comprehensive all-in-one starter bundle covers inflation, dusting, and standard airline connections
- Self-coiling 25-foot polyurethane recoil design retracts automatically to prevent shop floor clutter
- Standard 1/4-inch Industrial Type M couplers and plugs match standard American garage air setups
- Supplied with solid brass fittings and thread sealing tape to help prevent immediate airline leaks
Cons
- The 120 PSI maximum working pressure rating is unsuitable for high-pressure systems operating above standard home compressor thresholds
- The 1/4-inch inner diameter recoil hose introduces airflow restriction that may starve continuous high-CFM air tools like impact wrenches or grinders
- Recoil polyurethane hoses pull back with spring tension during extended reaching across large work areas
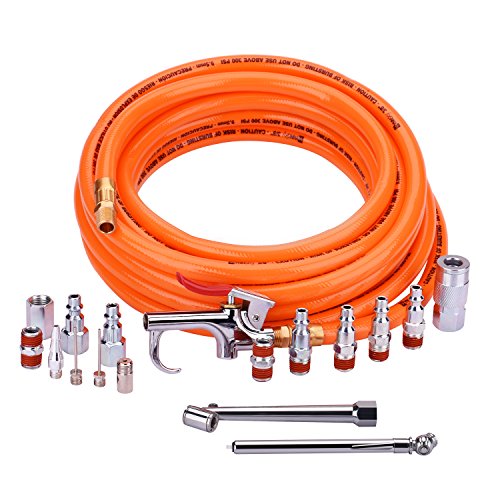
WYNNsky 3/8-Inch x 25ft PVC Air Hose Kit
Equipped with a lightweight PVC hose and a 17-piece accessory bundle, this package delivers the essential fittings needed for home workshop DIY projects. Solid brass connections ensure dependable seals, supported by a 300 PSI maximum working pressure.
Pros
- Solid brass fittings resist corrosion and seal reliably
- Complete accessory set provides essential starter fittings
- Lightweight hose design allows easy transport and handling
- Handles up to 300 PSI maximum working pressure
Cons
- 25-foot length provides limited reach across larger workshops
- PVC construction is typically less flexible than rubber hoses
FYPower 22-Piece Air Compressor Accessory Kit
Equipped with a 25-foot recoil hose, tire inflator gauge, and brass fittings, this 22-piece bundle covers routine pneumatic tasks and garage maintenance. It offers DIYers a versatile set of quick-connect fittings and inflation accessories ready for immediate use.
Pros
- Solid brass fittings resist corrosion and wear
- 360-degree swivel connector improves tool maneuverability
- Extensive 22-piece set handles diverse inflation tasks
- Compact recoil hose self-stores neatly
Cons
- 120 PSI hose rating limits high-pressure tools
- 25-foot reach restricts mobility in larger workshops
- Poly recoil hose is stiffer than rubber alternatives
FYPower 22-Piece 25ft Air Compressor Kit
Equipped with a 25-foot hybrid hose, inflator gauge, and blow gun, this 22-piece FYPower kit outfits home garages with essential pneumatic connections right out of the box. Brass fittings and corrosion-resistant steel couplers deliver reliable performance up to 300 PSI.
Pros
- Comprehensive 22-piece set covers most pneumatic tasks
- Durable brass fittings and corrosion-resistant steel couplers
- Lightweight, flexible 300 PSI hybrid air hose
- Includes 360-degree swivel connector and tire inflator gauge
Cons
- 25-foot hose limits reach in larger workspaces
- Maximum working pressure capped at 300 PSI
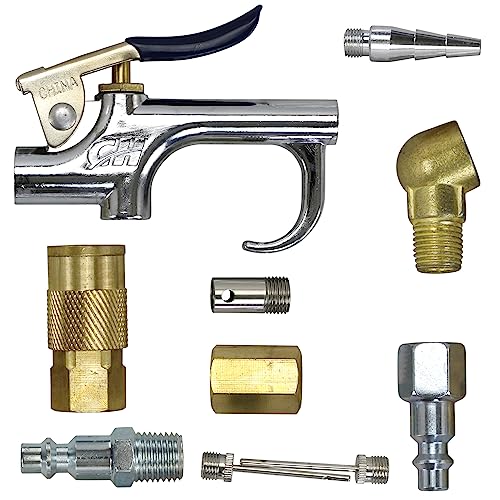
Harrier Hardware 11-Piece Air Compressor Starter
The Harrier Hardware 11-piece air compressor accessory kit provides essential pneumatic connections including a blow gun, tire chuck, and standard 1/4-inch NPT fittings. It is a practical starter set for garage DIYers and homeowners looking to handle basic inflation and shop cleanup tasks.
Pros
- Comprehensive 11-piece starter bundle covers basic inflation and workbench cleanup needs.
- Standard 1/4-inch NPT fitting compatibility connects easily with common workshop air hoses.
- Dedicated plastic storage container prevents losing small needles, inflator tips, and fittings.
- Cost-effective entry option for homeowners setting up a newly purchased air compressor.
Cons
- Supplies only one coupler and plug set, requiring extra fittings for multi-tool setups.
- Thread sealant or PTFE tape is not pre-applied and must be added to ensure leak-free connections.
- Designed for light DIY and garage duties rather than high-demand industrial production.
Hromee 19-Piece 25-Foot Air Compressor Kit
This starter bundle equips home workshops with essential inflation, cleaning, and connection attachments centered around a flexible 25-foot hybrid air hose. It offers rust-resistant brass fittings and versatile nozzles suited for everyday pneumatic tasks and basic tire maintenance.
Pros
- Flexible hybrid hose resists kinking and coils easily
- Durable brass couplers resist rust better than steel
- Includes specialized wire brush for bore cleaning
- Rubber tip nozzle protects delicate surfaces from scratches
Cons
- 25-foot hose length limits reach in larger workspaces
- Pencil tire gauge caps at 50 PSI maximum
Complete Guide to Setting Up and Configuring Your Air Compressor Hose
Setting up an air compressor hose properly creates a safe, reliable bridge between your air tank and pneumatic tools. While connecting an air line seems straightforward, poor fitting choices or missing thread sealant can cause persistent leaks, low tool torque, and safety risks. Walking through each mechanical connection methodically ensures that your air delivery system stays tight, responsive, and durable.
Understanding Air Hose Components and Thread Standards
Standard pneumatic systems in North America rely on National Pipe Taper (NPT) threads to join hoses, manifolds, and couplers. Unlike straight machine threads that need internal gaskets, NPT threads have a tapered profile that wedges tighter as you thread them together. Most consumer and light commercial air hoses use 1/4-inch male NPT (MNPT) or female NPT (FNPT) ends. Matching these thread diameters correctly prevents damaged fittings and establishes a solid foundation for your airline.
Quick-disconnect couplers make swapping air tools simple without needing to depressurize your compressor tank. Most standard workshop kits feature Type I/M industrial couplers and mating plugs, which use a spring-loaded outer collar and internal ball bearings to lock the fitting. Inserting the male plug opens an internal valve instantly to allow pressurized airflow. Releasing the outer collar immediately closes this valve, keeping tank pressure sealed safely inside the line.
The material of your air hose determines its flexibility, weight, and working pressure limits in different working environments. Lightweight polyurethane recoil hoses spring back into compact coils automatically, making them ideal for clean bench work within a 120 to 150 PSI range. Hybrid rubber and PVC blend hoses offer exceptional kink resistance and remain flexible in freezing weather while handling up to 300 PSI. Standard PVC lines remain a popular budget choice, although they tend to stiffen up in colder garages.
Essential Tools and Preparation Before Assembly
Assembling an air line system requires only a few basic workshop hand tools alongside your pneumatic hardware. You will need two adjustable wrenches or open-end wrenches to tighten fittings together without rounding brass hex edges. A roll of PTFE thread seal tape, commonly called Teflon tape, is essential for stopping micro-leaks between tapered metal threads. Having clean shop rags ready helps wipe away factory machining oils or loose debris from female fitting threads before assembly.
Before installing any fittings, inspect the output manifold and regulator port on your compressor. Turn the regulator knob fully counterclockwise to shut off outlet flow before starting any plumbing work. Check the threads on both the compressor discharge port and your hose ends for burrs or damaged peaks. Clean threads allow fittings to seat evenly, reducing the risk of cross-threading during installation.
Always confirm that the compressor tank is completely depressurized before threading hardware directly onto the manifold. Pull the ring on the ASME safety relief valve gently to verify that zero residual pressure remains stored in the vessel. Opening the bottom tank drain petcock ensures all air and accumulated water have exited safely. Working on a fully depressurized manifold protects your hands and prevents fittings from shooting loose under sudden force.
How to Seal Threads with PTFE Tape Correctly
Because tapered pipe threads leave slight microscopic gaps along the thread spiral, bare metal joints will almost always hiss air under pressure. Wrapping male threads with PTFE sealant tape fills these microscopic voids and acts as a lubricant that allows threads to seat deeply without galling. Liquid pneumatic thread sealants also work well, but quality PTFE tape provides clean, removable seals that do not foul internal tool valves. Never apply tape to the smooth nipple tip of quick plugs, as sealant belongs only on threaded joints.
To apply tape correctly, hold the fitting facing you with the male thread pointing toward your body. Wrap the tape clockwise around the threads so the direction of tightening pulls the tape tighter rather than unraveling it during assembly. Apply two to three snug, overlapping layers while keeping slight tension on the spool to mold the tape into the thread grooves. Leave the first one or two leading threads completely bare to prevent loose tape shreds from entering tool valves.
Thread the taped male fitting into the female receiving port by hand for the first few turns to ensure proper alignment. Once the threads engage cleanly without cross-threading, place one wrench on the stationary body and a second wrench on the hex nut of the fitting. Tighten the joint until snug, typically one and a half to two full turns past hand-tight. Avoid over-torquing brass fittings, as excessive force can crack female cast manifolds or warp thin brass walls.
Step-by-Step Hose Connection to the Compressor Manifold
The first mechanical connection links your compressor regulator outlet port to the inlet end of your air hose. Many portable compressors come equipped with a pre-installed female quick coupler directly on the regulated outlet manifold. If your tank only features a bare 1/4-inch female threaded port, thread a taped 1/4-inch male quick coupler into the manifold securely. This setup allows you to disconnect the main hose body instantly when packing up the compressor for storage.
Next, prepare the inlet end of your air compressor hose, which will link back to the tank. Thread a 1/4-inch male industrial quick plug onto this end of the hose if it does not already come pre-crimped with one. Many modern recoil and hybrid hoses feature integrated bend restrictors that surround the crimped connection to prevent severe bending fatigue near the brass barb. Tighten the plug hex base against the hose fitting using your two-wrench technique to avoid twisting the flexible hose carcass.
Connecting the hose to the compressor manifold requires a firm push into the female quick coupler. Pull back the outer sliding collar of the female coupler, insert the hose male plug firmly into the socket, and release the collar until it snaps forward. Tug gently on the hose connection to confirm that the internal ball bearings have locked into the plug groove completely. A secure mechanical lock ensures the hose will not detach violently when line pressure rises to operating levels.
Setting Up Tool-End Attachments and Quick Plugs
The working end of your air hose delivers compressed air directly to your pneumatic tools and accessories. To make tool swaps fast and efficient, install a female quick coupler onto this working end of the air hose. When threaded properly with PTFE tape, this female coupler seals off airflow automatically whenever no tool is plugged in. This allows you to disconnect a finish nailer and switch to an air blow gun without walking back to shut off the compressor.
Every pneumatic tool you plan to operate must have a matching male quick plug installed into its air inlet port. Wrap the 1/4-inch male threads of the plug with two turns of PTFE tape and thread it into the tool handle inlet by hand. Use a wrench to snug the plug down firmly, holding the tool casing steady to avoid placing strain on lightweight aluminum housings. Equipping all your pneumatic tools with identical Type I/M plugs ensures universal compatibility across your workshop.
Accessories like dual-foot tire chucks, pencil pressure gauges, and blow guns attach using this exact same plug interface. For DIY vehicle owners, tasks like inflating vehicle tires with a small compressor become effortless when your tire inflator snaps directly onto the hose coupler. Using swivel connectors between the tool and plug can also improve ergonomics, giving your wrist 360 degrees of rotation during intricate shop tasks.
Hose Diameter Selection and Airflow Optimization
Selecting the right internal diameter for your air hose plays a major role in pneumatic performance and tool power. Standard 1/4-inch inner diameter (ID) hoses work exceptionally well for low-demand intermittent tools like brad nailers, tire inflators, and blow guns. However, continuous-demand tools like dual-action sanders and high-torque impact wrenches draw far higher CFM and suffer from severe airflow starvation through narrow 1/4-inch lines. Stepping up to a 3/8-inch ID hose significantly expands air volume, delivering steady pressure under heavy loads.
Friction inside the hose causes dynamic pressure drop, meaning pressure at the tool drops noticeably whenever air flows rapidly. Over a standard 25-foot hose run, a 1/4-inch line exhibits minimal loss for light nailing, but a 50-foot or 100-foot run creates substantial pressure drop. Choosing a 3/8-inch hybrid line helps minimize friction loss over longer runs without adding excessive drag across your workspace. Matching hose bore to tool demand prevents premature tool stalling and preserves compressor efficiency.
Workshop layout also dictates whether you should rely on portable loose hoses or plumbed garage air systems. While portable recoil hoses offer quick deployment for driveway tasks, dedicated workshops often benefit from structured lines that mirror fixed garage air delivery systems. Even when using a wall-mounted setup, the flexible whip line connecting your reel to the tool follows the exact same 1/4-inch NPT coupler configuration detailed here.
Leak Testing and Operational Verification
Once all threaded connections and couplers are locked into place, you must verify the entire setup for air leaks before starting work. Plug the compressor into an appropriate electrical circuit, close the tank drain petcock, and allow the pump to build full cut-out pressure. With the tank fully charged, rotate the regulator adjustment knob clockwise to feed regulated air into your connected hose line. Keep all tools disconnected initially so line pressure equalizes against the closed female coupler at the far end of the hose.
Conduct a thorough soapy water bubble test along every threaded joint, quick coupler seam, and hose crimp collar. Mix a small amount of liquid dish soap with water in a spray bottle or apply it with an acid brush onto the metal fittings. If any joint leaks, expanding soap bubbles will form immediately over the escaping air pathway. If bubbles appear, mark the spot, depressurize the entire system, and tighten the fitting slightly or reapply fresh PTFE tape.
After confirming zero leaks along the line, set the regulator to your target working pressure, commonly 90 PSI for most pneumatic nailers and wrenches. Connect your air tool and depress the trigger briefly to confirm that line pressure recovers quickly without significant pressure drop on the gauge. A leak-free air hose preserves tank pressure for extended periods, reducing pump duty cycles and saving electricity.
Safe Disconnection and Maintenance Best Practices
Disconnecting an air hose under full pressure can cause the loose line to whip violently if not handled with care. To disconnect safely, grasp the tool firmly in one hand and slide back the female coupler collar with the other, keeping a steady grip on the fitting. Modern safety exhaust couplers release downstream air slowly before unlocking, but standard couplers vent line air with a sharp pop. Never point the open coupler toward your face, eyes, or bystanders during disconnection.
Moisture management is essential for preserving the inner liner of your air hose and preventing tool corrosion. As air compresses, ambient moisture condenses rapidly inside the steel tank and travels down the airline if left unaddressed. Open the bottom drain valve on your compressor tank after every work session to purge accumulated water completely. Installing an inline moisture filter between the regulator and hose inlet provides additional defense against wet air reaching your pneumatic tools.
Proper storage extends the lifespan of polyurethane, hybrid, and PVC hoses substantially. Coil your hoses in broad, loose loops or allow self-coiling recoil models to retract naturally without twisting the line carcass. Inspect repairable hose ends periodically, such as detachable PU compression nuts, to confirm the brass barbs remain firmly seated. Keeping your hoses clean, dry, and hung on broad radius wall brackets prevents sharp bends and outer jacket cracking over time.
Troubleshooting Common Air Hose Setup Issues
The most frequent issue encountered during air hose setup is a persistent hissing sound coming from the quick coupler interface. This leak usually stems from a dried, cut, or missing internal rubber O-ring inside the female coupler socket. Alternatively, a scratched or mismatched male plug nipple will fail to seat flat against the internal seal. Swapping worn plugs or replacing aged couplers with solid brass units resolves the majority of connector leaks quickly.
If a threaded connection continues to leak despite heavy tightening, the threads may be cross-threaded or under-taped. Disassemble the joint completely, inspect the male and female threads for stripped grooves, and wire-brush away shredded tape fragments. Re-wrap the joint carefully with two to three full turns of PTFE tape, making sure not to cross-thread the fitting as it re-enters the port. If a casting crack has formed in a female aluminum port, the damaged manifold component must be replaced.
Air tools that lack power or stall mid-cycle often indicate a restricted hose line rather than a faulty tool motor. Check the entire length of the hose for sharp kinks, tight bends, or crushing under heavy workshop equipment. If the line is kink-free, verify that the inner bore is adequate for the tool CFM rating, upgrading from a 1/4-inch to a 3/8-inch hose if needed. Maintaining clean, properly sized air delivery components ensures smooth, reliable pneumatic operation for every workshop project.
Setting up an air compressor hose correctly comes down to clean thread preparation, proper PTFE tape wrapping, and choosing durable industrial fittings. Taking the time to assemble each joint with two wrenches and verifying connections with a bubble test keeps your workspace safe and efficient. With leak-free couplers and the right hose material for your tasks, your pneumatic tools will deliver consistent power every time you fire up the compressor.
About the author
Kenny Koehler is a power-tool specialist with more than a decade of hands-on evaluation experience and a science-based approach to product testing. His expertise in repeatable testing, tool performance, impact wrenches, and professional equipment brings a practical, data-focused perspective to compressor and pneumatic-tool comparisons.