
How to Drain Air Compressor: Practical Guide for 2026
Learn how to drain air compressor tanks safely in October 2026 to eliminate internal moisture, prevent tank rust, and protect sensitive pneumatic tools.
 By Bob Beacham
Updated October 8, 2026
By Bob Beacham
Updated October 8, 2026

Moisture accumulation inside a steel receiver tank is an unavoidable byproduct of ambient air compression that threatens tank integrity and pneumatic tool performance. When atmospheric air is compressed, elevated temperatures hold vapor until cooling occurs inside the receiver, causing liquid water to pool directly at the base of the tank. Learning how to drain air compressor systems properly safeguards storage tanks from aggressive internal oxidation and stops water from contaminating spray finishes or pneumatic nailers. Reviewing a proper air compressor operation guide highlights how routine moisture purging preserves tank walls and maintains clean air delivery across demanding workshop projects.
Failing to release stored condensation leads to restricted air volume, corrupted pressure gauges, and costly premature equipment failure. Most portable units feature small brass thumb petcocks under the tank, while industrial stationary units benefit from accessible extension lines or electronic timed drain valves. Gaining a clearer perspective on fundamental air compressor mechanics helps operators understand why water separates from pressurized air during each compression cycle. Making tank purging a consistent daily habit prevents water buildup, extends valve longevity, and ensures dependable pneumatic tool performance every time the motor cycles.
Top Products
| Award | Product | ACR Score About ACR ScoreThe ACR Score is our own rating from 0 to 10, based on performance, design and build, ease of use, and value. It reflects independent research and is never influenced by manufacturers, retailers, or affiliate commissions. Learn more › | |
|---|---|---|---|
| Best Overall |
HK Extended Tank Drain Assembly Kit with 10 Inch
|
9.2/10 | Buy |
| Best Premium |
 Compressor auto drain timer valve, 1/4, 3/8
|
9.2/10 | Buy |
| Best Budget |
 SUNROAD Air Compressor Valve ,Ball Type Drain
|
9.1/10 | Buy |
| Best Value |
 Hromee Extended Tank Drain Assembly Kit with 10
|
8.9/10 | Buy |
 Air Compressor Drain Valve
|
8.6/10 | Buy | |
 Hromee Automatic Air Compressor Tank Drain Valve
|
8.6/10 | Buy | |
 Ingersoll Rand 54410931 EDV200 1/4" NPT Electronic
|
8.4/10 | Buy | |
 Extended Tank Drain Valve Assembly Kit for Air
|
8.3/10 | Buy | |
 QWORK Automatic Timed Condensate Drain Valve 1/2"
|
8.3/10 | Buy | |
 Automatic Electronic Tank Drain Kit
|
8.3/10 | Buy |
Step-by-Step Procedures and Upgrades for Draining Air Compressors
Compressed air systems naturally generate substantial amounts of liquid condensate during routine workshop operation. When ambient air enters the pump cylinder, moisture vapor enters alongside atmospheric gases and undergoes intense mechanical compression. The resulting thermal energy temporarily keeps that moisture vaporized, but the cooling process inside the steel receiver causes rapid condensation. Understanding how to drain air compressor tanks correctly is essential to maintaining pneumatic tool efficiency and preventing dangerous structural corrosion inside receiver vessels.
The Thermodynamics of Tank Condensation and Corrosion Risks
Ambient air contains dissolved water vapor that enters the compressor continuously through the intake air filter. Compressing this air reduces its physical volume dramatically while the moisture volume remains unchanged, rapidly pushing the air past its dew point. As hot compressed air enters the receiver tank and cools against the exterior steel walls, moisture condenses into pooling liquid water. In humid workshop environments, a standard compressor can easily collect several ounces of dirty water in just a few hours of intermittent operation.
Standing water reacts aggressively with the unlined interior steel shell of the tank, causing rapid oxidation and structural rust. Over time, internal rust pits the metal walls, thinning the pressure boundary and creating a severe risk of sudden tank rupture under load. Condensed moisture also carries abrasive rust particles directly into downstream air lines, ruining spray painting finishes and stripping critical lubricants from pneumatic tools. Reviewing an air compressor tank sizing guide clarifies how larger receiver volumes trap significantly higher quantities of moisture that demand systematic daily purging.
Essential Safety Precautions Before Bleeding Air Reservoirs
Purging pressurized air tanks requires basic safety precautions to avoid physical injury and messy workspace contamination. Water and particulate discharge from the drain port under substantial velocity, creating a forceful spray of rusty sludge and oily residue. Always wear impact-rated eye protection and heavy work gloves before reaching underneath the compressor to open any manual drain valve. Discharging air can also produce sudden noise levels exceeding safe auditory limits, making hearing protection advisable in enclosed garage spaces.
Lowering receiver tank pressure before opening the drain makes the bleeding process much safer and easier to control. Opening a drain valve under maximum pressure of 150 PSI or higher produces an unmanageable acoustic blast and spatters dirty water across shop surfaces. Experienced operators allow the tank to bleed down through an attached tool or blowgun until roughly 10 to 20 PSI remains. This modest residual pressure provides plenty of mechanical force to sweep pooled water outward without creating a violent aerosol mist.
Manual Draining Procedure for Factory Petcock Valves
Most portable air compressors arrive from the factory equipped with a compact brass thumb petcock at the bottom of the tank. Begin by turning off the compressor motor switch and disconnecting the power cord from the electrical outlet. Place a shallow catch pan or thick shop towel directly beneath the drain valve bung on the bottom belly of the tank. For portable pancake or hot dog tanks, tilt the unit slightly toward the drain opening to ensure trapped water pools directly over the outlet.
Grip the brass wings or knurled screw of the petcock and slowly rotate the fitting counterclockwise to break the seal. Escaping air will hiss outward while pushing a stream of brown or milky condensate into your collection pan. Keep the valve open until the liquid stream stops and only clean, dry air escapes from the port. Turn the valve clockwise until snug, taking care not to overtighten and shear the delicate brass threads on the fitting.
Standard replacement fittings, such as the Reluen 1/4 NPT male hand-turn brass petcock, are rated for working pressures up to 150 PSI and fit common female tank bungs. However, the small needle passage in factory petcocks is vulnerable to blockages from dislodged rust flakes and heavy sediment. If no air or water escapes after opening the petcock several turns, sediment has likely clogged the opening. Lightly tapping the valve body with a small wrench often dislodges loose rust flakes and restores normal flow.
Clearing Clogged Drain Ports and Installing Replacement Hardware
When a drain valve becomes completely blocked by sediment, the tank must be fully depressurized before attempting mechanical clearing. Pull the ring on the ASME safety relief valve until all air exhausts and the pressure gauge reads zero PSI. Attempting to unscrew a clogged drain fitting while pressure remains inside the tank risks forceful projectile ejection and severe injury. Once the tank is completely depressurized, use an open-end wrench to unthread the stuck valve assembly from the bottom tank port.
Inspect the removed fitting for packed mineral scale, pipe sludge, or damaged internal seat threads. You can push a short piece of stiff mechanic wire through the tank bung opening to clear compacted rust scale from the vessel floor. Clean the female threads on the tank port using a small wire brush to remove old thread sealant or torn Teflon tape. Wrap fresh PTFE thread seal tape clockwise around replacement fitting threads to ensure a leak-free mechanical connection.
Replacing a troublesome thumb petcock with a dedicated ball valve, such as the SUNROAD ball type mini valve with 1/4-inch NPT threads, provides superior reliability. Mini ball valves feature a solid brass body, chrome-plated internal ball, and an aluminum quarter-turn handle that opens with minimal effort. The unrestricted flow passage allows rust flakes and thick oily sludge to discharge without creating stubborn clogs. These compact brass valves handle up to 150 PSI working pressure and withstand temperatures ranging from sub-zero conditions up to 250 degrees Fahrenheit.
Upgrading to an Extended Tank Drain Assembly Kit
Reaching underneath heavy stationary tanks or awkward jobsite compressors to operate tiny petcocks is inconvenient and leads to skipped maintenance. Extended drain assembly kits solve this problem by routing the drain line out to an easily accessible location on the compressor frame. Kits such as the HK Extended Tank Drain Assembly Kit and the Hromee Extended Tank Drain Assembly Kit feature a 10-inch flexible braided steel hose. This stainless steel hose connects to the tank port via a 1/4-inch NPT elbow, terminating at a heavy-duty brass ball valve.
Installing an extension assembly requires only basic hand tools and takes roughly ten minutes on a completely depressurized tank. Thread the supplied 90-degree brass elbow into the tank drain bung using the pre-applied thread sealant or freshly wrapped thread tape. Attach the flexible braided hose to the elbow, tightening the connection securely without twisting the protective stainless steel wire mesh. Mount the terminating ball valve to a compressor leg or roll-cage bar using the supplied routing clamps or cable ties.
Braided steel lines in these assemblies boast maximum working pressures up to 175 PSI and impressive blasting pressures up to 475 PSI. Included brass hex bushings, typically 3/8-inch male by 1/4-inch female adapters, provide seamless compatibility across different tank bung sizes. The rubber-wrapped lever handle on the ball valve allows effortless quarter-turn operation without crawling on damp workshop floors. Because the drain valve is clearly visible on the outer frame, completing daily moisture purges becomes an effortless post-work routine.
Automating Condensate Removal with Electronic Timer Valves
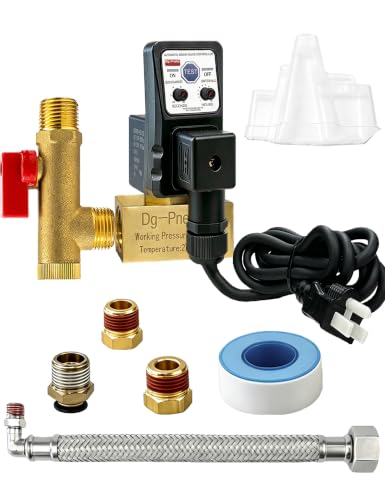
Busy automotive shops and industrial fabrication facilities often rely on electronic timed drain valves to automate moisture removal entirely. Automated devices, including the Dg-Pnetic compressor auto drain timer valve and the Hromee Automatic Drain Kit, use an electric solenoid valve managed by an integrated solid-state timer. Dual rotary dials allow operators to set discharge duration between 0.5 and 10 seconds and drainage intervals from 0.5 to 45 minutes. This automated scheduling ejects accumulated moisture consistently throughout the working day without requiring manual intervention.
Commercial electronic valves, such as the Ingersoll Rand EDV200 1/4-inch NPT electronic drain valve, offer heavy-duty reliability for demanding industrial installations. Powered by standard 110V to 120V electrical current, these units feature robust internal components, IP65 environmental ratings, and integrated test buttons for instant manual cycle checks. To prevent solenoid clogging from thick oily sludge, advanced kits include an inline ball valve strainer before the solenoid. Products like the SUNROAD Automatic Electronic Tank Drain Kit combine this strainer assembly with a flexible braided line to extend solenoid valve lifespan.
Similarly, the QWORK programmable timed condensate drain valve incorporates a 1/2-inch NPT inlet, 1/4-inch outlet, and illuminated status indicators. Maintaining electronic drain valves involves inspecting the internal brass strainer mesh quarterly to clear mineral scale and rust flakes. Testing the manual push button periodically confirms that the solenoid coil fires crisply and seals completely against tank operating pressure. These programmable electronic valves eliminate human error, ensuring your compressor tank remains dry even during prolonged high-demand work shifts.
Determining Optimal Drain Frequency and Seasonal Schedules
The ideal draining schedule depends on ambient workshop humidity, local temperatures, and compressor operating hours. In arid climates under light DIY use, draining the air tank once every week may be sufficient to control water levels. However, during hot summer months in high-humidity areas, running continuous pneumatic tools generates surprising amounts of liquid condensate every hour. Technical specifications explained in our guide on understanding compressor scfm ratings illustrate how continuous air consumption forces pumps to ingest massive quantities of humid ambient air.
Professional mechanics and woodworkers follow a strict end-of-day purging routine regardless of current seasonal conditions. Purging the receiver tank at the close of every workday ejects moisture while it remains warm and suspended, preventing it from settling overnight. Allowing standing water to pool inside the vessel overnight accelerates rust pitting and generates loose scale that fouls internal valve seats. Storing portable air compressors with the manual drain valve cracked slightly open promotes air circulation and discourages internal condensation formation during prolonged storage.
Preventing Moisture Contamination in Downstream Air Lines
Draining the compressor tank is the primary step in moisture management, but it cannot eliminate all water vapor from pneumatic supply lines. Warm compressed air leaving the tank carries vapor that condenses inside cooler air hoses as it travels toward pneumatic tools. Installing a dedicated particulate filter and water separator at the compressor regulator traps liquid droplets before they reach air tools. For sensitive tasks like automotive spray painting, adding a secondary desiccant dryer or coalescing filter prevents fish-eyes and moisture defects in finishes.
Permanent workshop air delivery networks benefit from pitched piping runs and dedicated vertical drop legs that guide condensation toward low-point manual drains. Taking air drops off the top of horizontal distribution headers prevents pooling water inside main lines from running straight down into flexible tool hoses. Pneumatic tools, including framing nailers and impact ratchets, require a few drops of pneumatic tool oil daily when run on dry air lines to preserve internal rubber o-rings. Pairing daily tank draining with proper line filtration delivers clean, moisture-free compressed air that maximizes tool longevity and protects your equipment investment.
Practical Maintenance Takeaways and Routine Verification
Establishing a dependable tank draining habit takes less than a minute at the end of each work session but adds years to compressor operating life. Whether utilizing a standard petcock, an extended braided steel kit, or an electronic timed solenoid, consistent moisture purging prevents internal corrosion. Always check that manual or electronic valves seal tightly after cycling to avoid subtle pressure leaks that trigger unnecessary motor restarts. Diligent moisture control protects your receiver tank, keeps pneumatic tools performing smoothly, and ensures safe operation across all future shop projects.
About the author
Bob Beacham is an experienced tools and workshop writer with deep knowledge of power equipment, mechanical systems, and practical DIY applications. His coverage of air compressors, welding equipment, saws, and workshop tools helps translate technical specifications into useful guidance for homeowners and serious DIYers.