
How to Connect an Air Hose to a Compressor: A Practical Guide for 2026
Learn how to connect an air hose to a compressor safely and prevent air leaks with proper NPT fittings, couplers, and regulators for October 2026.
 By Bob Beacham
Updated October 8, 2026
By Bob Beacham
Updated October 8, 2026

Operating pneumatic machinery requires a secure, leak-free connection between the pressurized air tank and your pneumatic tools. A sudden hiss of escaping air or an uncoupled hose whipping across the shop floor can turn a routine workshop project into a safety hazard in seconds. Understanding how to connect an air hose to a compressor ensures your setup maintains consistent operating pressure, protects internal pump components, and delivers sufficient volume for demanding pneumatic tools. Whether you are using an air compressor tank sizing guide to evaluate workshop air storage or firing finish nailers in a home garage, the connection process forms the foundation of your pneumatic air delivery system.
Connecting an air line involves more than merely snapping brass hardware together. Mechanics and woodworkers must properly match thread types, apply thread sealants correctly, and verify quick-disconnect coupler compatibility. Using mismatched industrial plugs or skipping proper inspection can cause dynamic pressure drops, damaged tool seals, or premature compressor cycling. When configuring complex garage plumbing or connecting an auxiliary air tank, mastering basic hose fittings keeps your system operating smoothly. This practical guide details fitting types, step-by-step connection sequences, leak prevention, and essential safety procedures.
| Award | Product | ACR Score About ACR ScoreThe ACR Score is our own rating from 0 to 10, based on performance, design and build, ease of use, and value. It reflects independent research and is never influenced by manufacturers, retailers, or affiliate commissions. Learn more › | |
|---|---|---|---|
| Best Overall |
16 Pack Universal 1/4" NPT Air Hose Fittings Kit
|
9.2/10 | Buy |
| Best Premium |
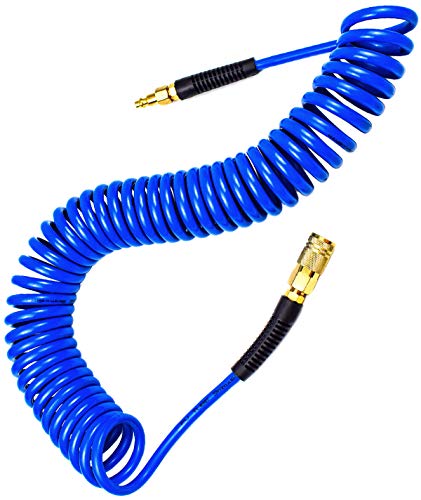 YOTOO Polyurethane Recoil Air Hose
|
9.2/10 | Buy |
| Best Budget |
 2 Pack 1/4 NPT Male Air Compressor Fittings
|
9.1/10 | Buy |
 LUMITECO Tire Inflator Hose Adapter
|
9.1/10 | Buy | |
 Minimprover Lead -Free Brass 16.9" Winterize
|
9.1/10 | Buy | |
 Air Compressor 1/4" Quick Connect Plug To GHT 3/4"
|
8.4/10 | Buy | |
| Best Value |
 LUMITECO 9.8 FT Extension Recoil Air Hose Adapter
|
8.4/10 | Buy |
 Ailbiuko 6FT 3/8" Hybrid Air Compressor Hose Kit
|
8.4/10 | Buy | |
 LUMITECO 2-Pack Ball Foot Air Chuck Set
|
8.1/10 | Buy | |
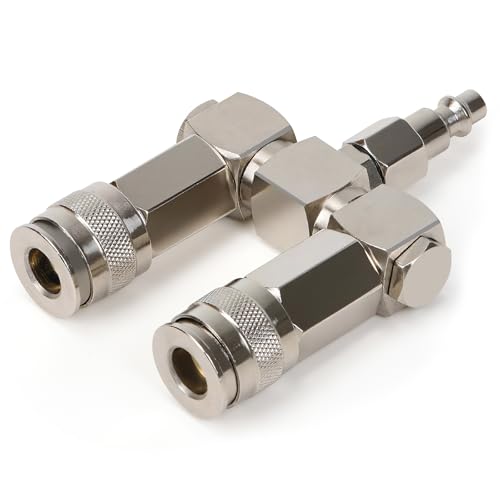 2-Way Air Hose Splitter, 1/4" NPT Air Compressor
|
7.8/10 | Buy |
Complete Technical Guide to Connecting Compressor Air Hoses
Connecting an air hose to an air compressor requires proper mechanical alignment, thread sealing, and strict safety awareness. Achieving an airtight connection ensures that pressurized air flows smoothly from the compressor tank to your pneumatic tools without energy loss or pressure drops. Following a standardized connection sequence prevents sudden hose disconnects, reduces pump wear, and maintains a safe, productive workshop environment.
Understanding Quick-Connect Coupler Types and NPT Thread Standards
Pneumatic systems rely primarily on quick-connect couplers and mating plugs to link hoses, compressors, and air tools quickly. The standard industrial interchange profile, commonly designated as Type M or I/M, remains the most prevalent configuration across home garages and professional job sites. Other configurations such as Type T automotive, Type ARO, and high-flow profiles share similar shapes but feature different neck dimensions and shoulder angles. Universal female couplers feature internal tolerances engineered to accept multiple plug profiles securely, preventing accidental disconnections and dangerous pressure releases.
Threaded connections on compressors and hose ends utilize National Pipe Taper threads, standardly abbreviated as NPT. Standard consumer air compressors feature 1/4-inch NPT discharge ports, while larger industrial systems often utilize 3/8-inch or 1/2-inch ports. Because NPT threads are cut on a slight taper, the male and female threads wedge together mechanically as you tighten them. Even with tapered geometry, microscopic gaps remain along the thread roots that require dedicated thread sealant to prevent continuous air leaks.
A standard quick-connect coupler consists of a brass or plated steel outer sleeve, internal spring mechanisms, locking steel ball bearings, and a rubber O-ring seal. When you push a matching male plug into the coupler body, the plug pushes past the internal ball bearings and compresses against the sealing O-ring. The sliding outer sleeve then snaps forward over the locking balls, trapping the shoulder of the male plug firmly inside the assembly. Releasing the connection requires pulling the outer sleeve backward against its internal spring, which allows the locking balls to expand outward and release the plug.
Safety Protocols and Equipment Inspection Before Setup
Inspect the operating condition and pressure status of your air compressor before handling any air line fittings. Turn the compressor power switch off and rotate the regulator adjustment knob counterclockwise to close the discharge port. Eye protection is mandatory whenever working around pressurized air lines, as dislodged debris or failing O-rings can propel particles at high velocity. Check the compressor tank pressure gauge and pull the safety relief valve ring briefly to ensure that internal air passages vent freely.
Examine the air hose across its entire length to identify potential structural damage before attaching it to the compressor. Check the outer jacket for deep cuts, surface abrasions, dry-rot cracking, or severe kinks that weaken the inner reinforcement cords. Inspect the crimped metal ferrules at both ends to ensure that the hose has not begun pulling loose from the internal barbs. Verify that the hose carries a working pressure rating of at least 150 PSI to safely handle standard compressor cut-out cycles.
Make sure that the working pressure limits of every connected component align with the compressor pump output. Standard single-stage compressors produce maximum tank pressures between 125 PSI and 150 PSI, while two-stage models frequently reach 175 PSI. Lightweight hoses, unrated plastic tubing, or damaged fittings can burst unexpectedly when subjected to full tank pressure. Utilizing heavy-duty hybrid or polyurethane hoses equipped with integrated bend restrictors minimizes structural fatigue at the fitting joints.
Step-by-Step Procedure for Connecting the Air Hose
Locate the regulated discharge coupler on the compressor manifold and wipe the mating surfaces clean with a dry cloth. Removing sawdust, dirt, and grit prevents debris from entering the coupler body and scoring the internal rubber sealing ring. Check that the spring-loaded outer sleeve slides smoothly back and forth against its internal return spring. Clean, unobstructed fittings ensure a rapid connection and eliminate premature O-ring wear.
Grip the air hose firmly behind the male plug while supporting the compressor discharge coupler with your opposite hand. If your compressor uses a manual coupler, pull the sliding outer sleeve backward toward the compressor manifold using your fingers. Push the male plug straight into the coupler bore until it seats firmly against the internal rubber seal, then release the outer sleeve. On modern push-to-connect couplers, simply push the male plug straight into the socket until the internal locking balls snap into place with a clear metallic click.
Perform a manual pull test by giving the hose a sharp backward tug while holding the compressor manifold steady. The connection should hold firm without slipping, backing out, or displaying loose play inside the coupler body. Once you confirm mechanical engagement, rotate the compressor regulator knob clockwise to open airflow into the newly attached hose. Listen along the fitting junction for any hissing sounds, ensuring the connection remains completely silent as line pressure builds.
Sealing Threaded NPT Connections with PTFE Tape
Permanent and semi-permanent threaded joints between hose ends, couplers, and manifold ports require proper thread sealing. Because tapered NPT threads seal along an angled spiral path, microscopic clearances remain along the thread roots even under high tightening torque. PTFE thread tape, commonly known as Teflon tape, fills these microscopic clearances and lubricates the threads during assembly. High-pressure thread sealant paste provides an equally reliable seal, particularly on stationary workshop piping systems.
Apply PTFE tape by holding the fitting with the threaded pipe end pointing toward you, wrapping the tape in a clockwise direction. Maintain firm tension so the tape draws snugly into the thread grooves, applying two to three full wraps of standard white sealant tape. Always leave the first one or two male threads completely uncovered at the tip to prevent loose tape shreds from entering downstream valves. Thread the fitting by hand first, then tighten it one to two turns past hand-tight using two wrenches for support.
Proper wrench technique protects fragile compressor components during installation. Place one open-end wrench securely on the compressor manifold boss to counteract twisting force, and place a second wrench on the hex portion of the fitting. Tightening without counter-holding the manifold can bend thin regulator brackets or crack cast aluminum regulator housings. Tighten the joint until it feels firm and resists hand rotation, avoiding excessive force that could distort tapered brass threads.
Connecting Pneumatic Tools, Splitters, and Specialized Attachments
The discharge end of your air hose features a female quick-connect coupler designed to attach directly to pneumatic tools. Installing male quick-connect plugs onto tool inlets allows you to swap between nailers, impact wrenches, and tire chucks rapidly. When configuring tools for demanding carpentry or construction, our framing nailer air compressor sizing guide details how matching air delivery volume to tool consumption prevents fastener driving failures. Ensuring sufficient air volume through your hose keeps tools cycling at peak performance.
Tool maintenance practices also dictate how you manage your air hose connections and pneumatic supply lines. Many pneumatic tools require a few drops of specialized oil added directly to the male air inlet plug before connecting the hose. Consulting our air tool oil compatibility guide clarifies which lubricants protect tool seals without gumming up internal motor components. Keep dedicated clean hoses for spray painting or finish carpentry to prevent oil droplets from ruining sensitive work surfaces.
Specialized workshop tasks often require multi-tool splitters or seasonal maintenance adapters connected directly to your air lines. A two-way air manifold featuring a 360-degree swivel connector allows two operators to run independent hoses from a single compressor outlet without kinking lines. Brass blowout adapters enable compressors to clear water lines in RVs, campers, and underground sprinkler lines before winter freezing occurs. Lock-on tire inflator adapters equipped with rotating chucks streamline vehicle tire maintenance, providing hands-free inflation without air leakage.
Diagnosing Air Leaks and Troubleshooting Common Connection Faults
Undetected air leaks waste compressed energy, accelerate pump wear, and cause your compressor motor to cycle repeatedly during idle periods. If you hear air hissing near a fitting, apply a light mist of soapy water to the threaded joints and coupler interface. Escaping air will generate distinct soap bubbles directly at the failure point, allowing you to identify whether the leak stems from threads or the coupler bore. Wipe the metal surfaces dry immediately after inspection to prevent surface corrosion on steel fittings.
Leaks occurring inside the quick-connect coupler bore typically stem from a damaged, flattened, or missing internal rubber O-ring. Repeated insertions of dirty or burred male plugs can slice through the internal nitrile seal over time. Many couplers permit removing the damaged O-ring with a small pick so you can insert a fresh replacement. Additionally, verify that the male plug matches the coupler profile, as forcing an incompatible automotive plug into an industrial coupler creates an imperfect seal that leaks continuously.
Mechanical jamming occurs when sawdust, rust flakes, or metal shavings settle behind the sliding collar. When foreign particles block the collar travel, the internal locking balls cannot retract fully, preventing male plugs from seating. Spraying the coupler sleeve with electrical contact cleaner or clean compressed air dislodges accumulated debris without leaving sticky residues. Applying a light drop of silicone lubricant to the collar sleeve restores smooth spring-back action in dusty shop environments.
Optimizing Hose Diameter, Material, and Length for Airflow
Hose inner diameter directly determines how much air volume reaches your pneumatic equipment under continuous load. Compact 1/4-inch inner diameter hoses offer lightweight convenience for light-duty brad nailers, tire inflators, and blowguns around a workbench. Continuous air tools such as rotary sanders, die grinders, and HVLP paint sprayers require 3/8-inch inner diameter hoses to avoid severe pressure drops. Using an appropriately sized hose prevents tool stalling and maintains consistent operating pressure during heavy pneumatic tasks.
Selecting the right hose material improves maneuverability and reduces mechanical stress on your compressor fittings. Polyurethane recoil hoses provide lightweight convenience and snap back into tight coils automatically, making them well suited for clean benchtop workspaces. Hybrid rubber and PVC lines remain pliable in freezing weather, lay flat on shop floors, and resist kinking during heavy use. Equipping your air lines with molded bend restrictors reduces bending strain at the fitting junctions, prolonging the lifespan of crimped hose assemblies.
Managing air hose length effectively protects both your electrical circuits and pneumatic performance. Extending your reach by adding a 50-foot air hose is far safer than running long electrical extension cords to the compressor motor. Undersized extension cords produce dangerous electrical voltage drops that can overheat motors or trip household circuit breakers on startup. Air lines experience minor pressure loss over distance, but you can easily compensate by raising the regulator output slightly.
Safe Disconnection and End-of-Day Shutdown Routines
Disconnecting an air hose requires relieving internal pressure before disengaging the quick-connect fitting mechanism. Never pull the coupler sleeve backward while the line remains under full tank pressure, as the loose hose end can whip unpredictably. Close the compressor regulator knob or discharge valve, then actuate an attached blowgun or tool trigger to vent trapped air from the hose. Once line pressure drops completely, pull the coupler sleeve back while supporting the hose to release the plug smoothly.
Finish your work session by completing essential compressor maintenance and storing your air lines properly. Turn the power switch off, disconnect the electrical cord, and open the tank drain valve underneath to purge accumulated moisture. Draining tank water daily prevents internal rust from weakening the steel vessel and keeps moisture from entering your air lines. Coil your air hoses in wide, loose loops on a wall bracket to prevent kinking, keeping couplers clean and ready for your next project.
Regular inspection of all brass and steel fittings extends the operating life of your entire pneumatic setup. Check male plugs for rounded shoulders or burred edges, replacing worn fittings before they damage the internal O-rings of your female couplers. Store spare plugs, couplers, and replacement O-rings in a clean shop drawer to address connection issues immediately. Establishing these simple connection and maintenance routines guarantees safe, efficient pneumatic power whenever you power up your air compressor.
About the author
Bob Beacham is an experienced tools and workshop writer with deep knowledge of power equipment, mechanical systems, and practical DIY applications. His coverage of air compressors, welding equipment, saws, and workshop tools helps translate technical specifications into useful guidance for homeowners and serious DIYers.