
How to Blow out Hose With Air Compressor: Practical Guide for 2026
Learn how to blow out hose with air compressor safely and clear residual water before freezing weather arrives. Updated for October 2026.
 By Bob Beacham
Updated October 8, 2026
By Bob Beacham
Updated October 8, 2026
Residual moisture trapped inside outdoor water hoses and line fittings presents a serious threat when freezing winter temperatures arrive. Water left inside rubber or vinyl tubing expands as it freezes, which quickly splits hose walls, damages brass connectors, and ruins connected plumbing. Learning how to blow out hose with air compressor equipment provides an efficient way to evacuate standing water before severe weather sets in. Many homeowners and RV owners rely on regulated pneumatic pressure to clear both garden hoses and vehicle water lines safely without damaging delicate seals.
Regulating working pressure remains the single most critical factor during any line evacuation process. High volume airflow at low operating pressure pushes standing water out smoothly, whereas uncontrolled tank pressure can rupture hose jackets or blow out internal o-rings. Using dedicated blowout adapters featuring integrated shut-off ball valves helps you modulate airflow and protect equipment during seasonal maintenance. Understanding the proper setup, required fittings, and safe compressor regulation ensures your hoses and plumbing remain protected throughout the coldest months.
| Award | Product | ACR Score About ACR ScoreThe ACR Score is our own rating from 0 to 10, based on performance, design and build, ease of use, and value. It reflects independent research and is never influenced by manufacturers, retailers, or affiliate commissions. Learn more › | |
|---|---|---|---|
| Best Overall |
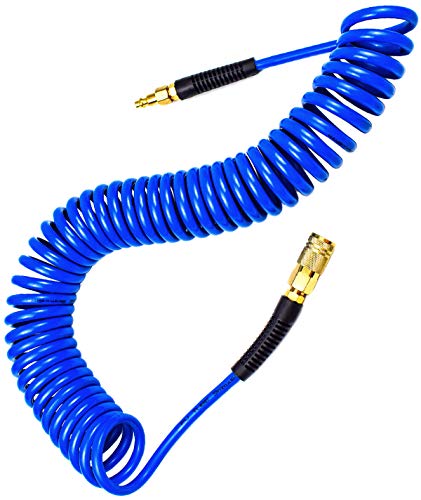
YOTOO Polyurethane Recoil Air Hose
|
9.2/10 | Buy |
| Best Value |
 Minimprover 12-Inch Blowout Adapter with Valve
|
9.1/10 | Buy |
| Best Budget |
 YELUN Brass RV Winterizing Blowout Kit
|
8.4/10 | Buy |
 Litorange Lead-Free Brass Winterize Sprinkler
|
8.0/10 | Buy | |
 Dual Purpose Winterize Adapter with Quick
|
7.8/10 | Buy | |
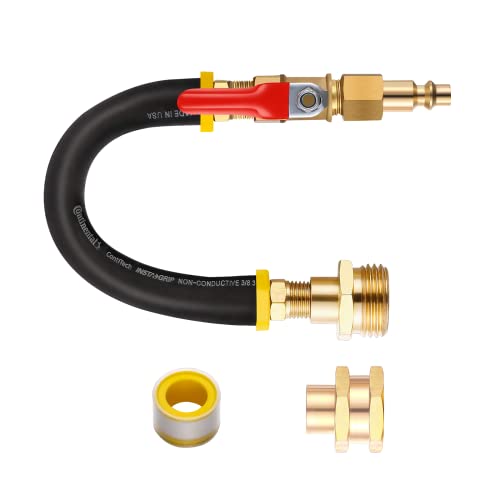 RV Winterizing kit & Sprinkler Blowout Adapter
|
7.8/10 | Buy | |
| Best Premium |
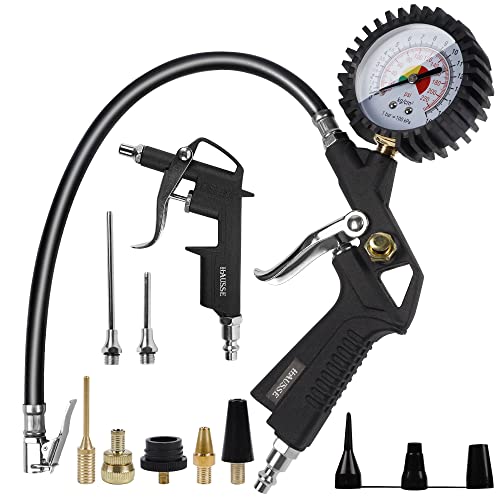 Hausse Heavy Duty Air Compressor Accessory Kit
|
7.8/10 | Buy |
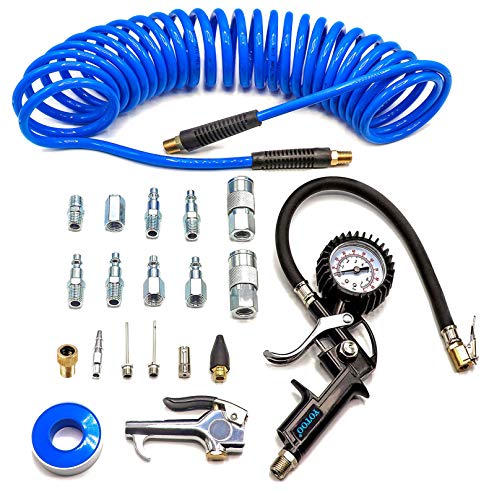 YOTOO Heavy Duty Air Compressor Accessories Kit 20
|
7.8/10 | Buy |
Minimprover 12-Inch Blowout Adapter with Valve
Built with lead-free brass and flexible EPDM rubber, this adapter connects an air compressor to standard garden hose threads to clear water lines. Its integrated shut-off valve and 300 PSI tolerance make winterizing RVs and sprinkler systems straightforward in confined spaces.
Pros
- Certified lead-free brass ensures safer potable water line maintenance
- Rated for high working pressures up to 300 PSI
- Flexible rubber hose maneuvers easily into cramped connection points
- Built-in valve provides direct control over compressed air flow
Cons
- Requires a separate air compressor to operate
- Short 12-inch reach may require working close to fittings
- Demands careful pressure regulation to prevent plumbing damage
Complete Guide to Blowing Out Hoses Using Compressed Air
Clearing trapped water from hoses and utility supply lines requires a steady balance of controlled air pressure and sufficient airflow volume. Applying compressed air forces standing water puddles through the length of the tubing until only dry air exhausts from the open discharge end. When you understand how to blow out hose with air compressor fittings properly, you prevent freeze damage while avoiding common hazards like line rupture or blown connector gaskets. Following the correct operational sequence ensures complete line winterization without stressing your pneumatic equipment or plumbing fixtures.
Regulated Air Pressure Versus Air Volume Dynamics
Many beginners assume that clearing standing water from a hose requires blasting maximum tank pressure through the line. In reality, excessive pressure above 50 PSI can easily burst rubber hose walls, crack RV plastic plumbing, or damage internal valve assemblies. Water evacuation depends primarily on cubic feet per minute (CFM) air volume rather than high pounds per square inch (PSI) force. A steady stream of medium-pressure air creates a continuous displacement front that pushes the water column forward efficiently.
Keeping your air compressor regulator dialed between 30 and 45 PSI provides optimal clearing velocity for typical garden hoses and domestic water lines. Operating within this moderate pressure window maintains safety while still generating enough continuous airflow to sweep low spots where liquid collects. Compressor tank storage capacity acts as a reservoir that maintains this velocity throughout the evacuation cycle. Matching your pacing to your compressor output prevents pump strain and guarantees thorough water removal without spiking system pressure.
Essential Fittings and Blowout Adapter Types
Connecting an air delivery line to a standard water hose requires specialized adapter hardware designed to bridge pneumatic and plumbing threads. Standard North American setups rely on a 1/4-inch industrial quick-connect plug on the pneumatic end paired with a 3/4-inch garden hose thread connector. Compact rigid brass plugs such as those from LitOrange offer a sturdy, direct interface that works well in open spaces. Flexible hose adapters, such as designs utilizing EPDM or reinforced synthetic rubber whip lines from Minimprover and BUTTIKU, provide significant advantages by reducing mechanical strain on delicate spigots and vehicle inlet ports.
Integrating an inline shut-off ball valve into your blowout adapter provides precise airflow regulation right at the connection point. Adapters featuring quarter-turn ball valves, such as the WINAMOO dual-purpose adapter and YELUN blowout kits, allow you to control air delivery without walking back to the compressor manifold. You can pre-charge the air supply line, open the ball valve gradually to introduce air smoothly, and shut it off instantly when water expulsion finishes. This level of local control protects sensitive water fittings from sudden pneumatic shock loads.
Preparing Your Air Compressor and Safety Equipment
Proper preparation prevents accidental equipment damage and protects you from pressurized spray during the line clearing procedure. Always put on certified safety goggles before attaching or pressurizing pneumatic fittings, because high-velocity droplets or mineral scale can eject toward your face. Purging accumulated condensation from your compressor tank is an equally critical preliminary step before connecting to any water line. Opening the bottom drain valve purges dirty moisture slurry so it never contaminates the clean hoses or plumbing fixtures you intend to winterize.
Setting the secondary pressure regulator correctly guarantees that only safe operating pressures enter your blowout adapters. Turn the regulator adjustment knob counterclockwise to drop outlet pressure to zero before starting the compressor motor. Allow the pump to build full tank pressure until the pressure switch automatically cuts off the motor. Slowly rotate the regulator knob clockwise until the regulated outlet gauge reads between 30 and 40 PSI, establishing a reliable, safe baseline for the task.
Step-by-Step Procedure for Clearing Garden Hoses
The line clearing process begins by disconnecting the garden hose from the outdoor water spigot and stretching it out along a flat or gently sloping surface. Straightening kinks and coils reduces internal friction and prevents water from pooling in hidden loops. Allow any loose water to drain out naturally through gravity before connecting your pneumatic equipment. Keeping the discharge end completely unblocked ensures that air can escape freely without building dangerous backpressure inside the hose core.
Thread your blowout adapter securely into the female fitting of the garden hose, ensuring the internal rubber washer sits flush against the brass seat. Connect your compressor air hose to the adapter using the 1/4-inch industrial quick-connect coupler, verifying that the sliding collar locks firmly into place. If your adapter includes a ball valve, make sure the lever is turned perpendicular to the line in the closed position. Inspect all threaded connections to confirm a secure mechanical seal before introducing air into the line.
Open the adapter ball valve slowly to introduce the regulated 35 PSI airflow into the hose chamber. Water will initially pour out of the far end in a steady stream before breaking into sputtering bursts of droplets. Running short air pulses proves far more effective than leaving the air supply continuously open, allowing liquid adhering to the hose walls to collect at low spots between bursts. Once the discharge transitions into a fine airborne mist followed by dry air, close the ball valve and safely disconnect the line.
Adapting the Blowout Process for RV Water Lines and Sprinklers
Winterizing recreational vehicles and underground irrigation systems follows similar pneumatic principles but demands extra caution regarding line routing and component vulnerability. For RV winterization, screw a male 3/4-inch garden hose thread blowout adapter directly into the city water inlet port. Ensure that your water heater bypass valve is engaged and the fresh water tank drain remains open before introducing compressed air. Evacuating fixtures sequentially from the nearest faucet to the furthest outlet concentrates available air volume and prevents cracking delicate plastic PEX plumbing.
Lawn sprinkler systems present higher volume demands that challenge small residential air compressors. Irrigation manifolds consist of buried lateral lines and multiple sprinkler heads that require substantial CFM volume to pop up and purge properly. To winterize sprinklers effectively, clear one individual zone at a time rather than pressurizing the entire manifold simultaneously. Allow your compressor to recharge to its cut-off pressure between zones so you always have a full air buffer before opening the next control valve.
Cleaning and Evacuating Pneumatic Compressor Hoses
Blowing out lines is not restricted to garden hoses; dedicated pneumatic air hoses also require regular clearing to remove accumulated oil and moisture. Over time, compressed air lines collect condensate that can rust nailer internals or ruin spray painting projects. Polyurethane recoil hoses, such as the 1/4-inch YOTOO recoil hose, benefit from regular dry air purges to flush residual oil mist. Disconnecting all tools, reducing line pressure, and blowing through the open line keeps pneumatic delivery systems clean and reliable.
Air compressor accessory kits, like those from Hausse or YOTOO, provide useful blow guns and specialized nozzle tips for detailed line cleaning. Attaching a standard blow gun with a rubber safety tip lets you clear dust, pipe shavings, and debris from disconnected hose ends and storage reels. Always verify that blow guns comply with standard pressure drop practices and never direct pressurized air streams toward skin. Maintaining clean internal air passages prevents foreign particles from migrating into sensitive air tools during workshop operation.
Common Mistakes That Damage Hoses and Equipment
The most frequent mistake during hose blowout procedures is using unregulated compressor tank pressure. Direct tank pressure from a typical workshop compressor often reaches 125 to 175 PSI, which easily exceeds the burst pressure of standard garden hoses and plastic plumbing. Subjecting water lines to raw tank pressure can split seams, distort hose jackets, and create severe blowouts that endanger anyone standing nearby. Always verify that the secondary line regulator is dialed down between 30 and 40 PSI before connecting your air line.
Another critical error involves leaving the discharge end of the hose closed or running the compressor pump continuously until it overheats. If a spray nozzle remains closed at the far end, static pressure rapidly builds to equal regulator output without inducing any water movement. Furthermore, small oil-free portable compressors feature intermittent duty cycles and will overheat if forced to blow continuous air through open lines. Pulsing the airflow in short bursts protects the compressor motor from thermal overload shutdowns while giving the pump time to recharge.
Compressor Sizing and Tank Recovery Considerations
Choosing the right air compressor for line blowout tasks depends primarily on air volume delivery and tank buffer capacity. Compact 1-gallon to 6-gallon pancake compressors handle standard 25-foot to 50-foot garden hoses quite well when operated in short pulses. However, longer 100-foot hoses or multi-head sprinkler zones benefit significantly from larger tanks that store substantial air reserves. Compressors rated for higher CFM output at 40 PSI maintain continuous air velocity without stalling water columns midway through long pipe runs.
Understanding your compressor cut-in and cut-out pressure thresholds helps you time your blowout bursts effectively. When line pressure drops below the cut-in mark, the motor restarts to replenish the tank reservoir. Pausing your blowout operation while the compressor recharges ensures that you always introduce air at full volume rather than struggling against fading pressure. Maintaining this cadence prevents premature pump wear and ensures every blast carries enough momentum to lift trapped water out of dips and sags.
Post-Evacuation Inspection and Proper Seasonal Hose Storage
Once the blowout process is complete, confirming that lines are genuinely dry prevents surprise freeze damage during harsh winter months. Disconnect the blowout adapter and inspect the male and female fittings for residual droplets. Lifting the hose and giving it a gentle manual sweep can reveal any stubborn moisture pockets that may have settled back after airflow stopped. If significant water drips out during this final manual check, repeat one additional short blowout cycle to ensure total evacuation.
Proper storage practices keep your hoses flexible and ready for quick deployment when warm weather returns in the spring. High-grade polyurethane hoses, like recoil designs from YOTOO, maintain cold-weather flexibility down to -40 degrees Fahrenheit without stiffening or cracking. For standard rubber or vinyl garden hoses, coil them loosely on a wall-mounted hanger or inside a protected shed to prevent sharp bends and flat spots. Keeping your brass blowout adapters clean, dry, and lightly lubricated ensures smooth threading and reliable service for seasons to come.
Mastering the proper technique for blowing out hoses protects your outdoor plumbing and watering gear from expensive winter freeze damage. Using durable lead-free brass adapters equipped with integrated ball valves gives you complete control over airflow while keeping pressures at safe operating thresholds. Taking the time to regulate line pressure to 35 PSI and pulsing airflow in short bursts guarantees thorough moisture removal without stressing hose materials. With the correct hardware and safety precautions, seasonal line evacuation becomes a simple, repeatable maintenance routine.
About the author
Bob Beacham is an experienced tools and workshop writer with deep knowledge of power equipment, mechanical systems, and practical DIY applications. His coverage of air compressors, welding equipment, saws, and workshop tools helps translate technical specifications into useful guidance for homeowners and serious DIYers.