
How to Connect Two Air Compressor Hoses Together: Practical Guide for 2026
Learn how to connect two air compressor hoses together safely and maintain optimal CFM delivery for pneumatic tools with our practical guide for October 2026.
 By Tony Carrick
Updated October 8, 2026
By Tony Carrick
Updated October 8, 2026

Extending your pneumatic reach across a large garage, driveway, or jobsite often tempts workers to plug undersized electrical extension cords into a portable air compressor. Doing so risks severe motor voltage drop, blown household fuses, and potential motor burnout on startup. Running additional pneumatic line is the standard trade recommendation to deliver pressurized air farther away while keeping the compressor firmly plugged into a dedicated wall outlet. Understanding how to connect two air compressor hoses together allows you to double your working perimeter without starving pneumatic tools of essential volume or risking electrical system overload.
Whether you are driving framing nails on a roof, operating an impact wrench around vehicle bays, or applying finishes with an HVLP paint gun, coupling two air lines requires the correct mechanical fittings to avoid annoying leaks and hazardous line disconnects. Standard pneumatic connections typically rely on threaded brass or steel fittings, quick-connect couplers, or dual-line splitters rated for standard working pressures up to 300 PSI. By matching hose inner diameters, selecting compatible plug profiles, and applying proper thread sealant, you can join multiple hoses efficiently. This guide outlines the essential hardware, step-by-step procedures, and airflow principles needed to link lines securely while maintaining consistent working pressure.
| Award | Product | ACR Score About ACR ScoreThe ACR Score is our own rating from 0 to 10, based on performance, design and build, ease of use, and value. It reflects independent research and is never influenced by manufacturers, retailers, or affiliate commissions. Learn more › | |
|---|---|---|---|
| Best Overall |
FORNAX 2-Way Straight Air Manifold Air Splitter
|
9.2/10 | Buy |
| Best Budget |
 Lead-Free Brass Winterize Sprinkler Systems
|
9.1/10 | Buy |
| Best Premium |
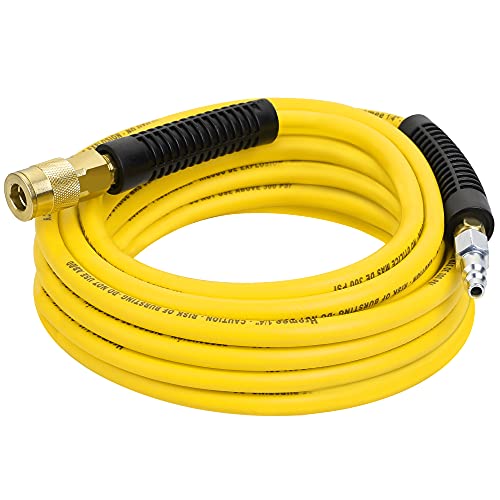 Hromee Air Compressor Hose 1/4 Inch x 25 Feet
|
8.6/10 | Buy |
 Air Compressor 1/4" Quick Connect Plug To GHT 3/4"
|
8.4/10 | Buy | |
| Best Value |
 LUMITECO 9.8 FT Extension Recoil Air Hose Adapter
|
8.4/10 | Buy |
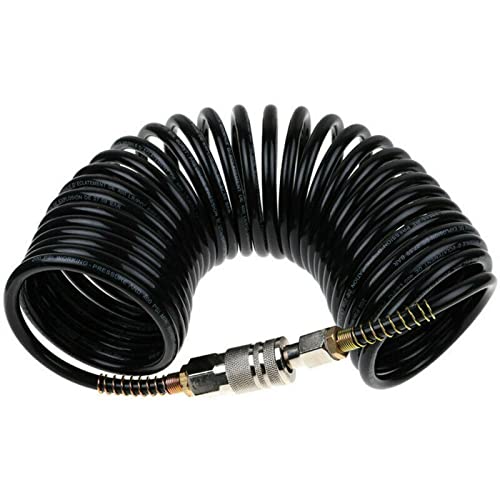 25ft Air Compressor Hose with Bend Restrictor
|
8.4/10 | Buy | |
 WNCGC 15 Pieces Air Compressor Hose Fitting Kit
|
8.3/10 | Buy | |
 Litorange Lead-Free Brass Winterize Sprinkler
|
8.0/10 | Buy | |
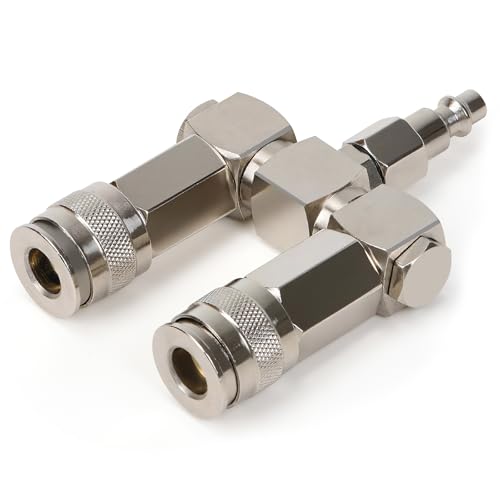 2-Way Air Hose Splitter, 1/4" NPT Air Compressor
|
7.8/10 | Buy |
Complete Guide to Linking Air Compressor Hoses Safely and Efficiently
Joining multiple air lines is one of the most practical skills you can learn when managing garage workshops or outdoor jobsites. The process sounds straightforward on paper, but air hoses carry intense kinetic energy and high internal pressures that demand proper mechanical connections. Taking the time to understand fitting styles, friction loss, and safety couplers ensures your pneumatic equipment runs smoothly without sudden pressure drops or hazardous line failures.
Why Extending Air Lines Is Safer Than Using Electrical Extension Cords
Electric air compressor motors draw significant current during startup, often creating an immediate inrush spike that tests standard 15-amp or 20-amp household circuits. Plugging an air compressor into a long, thin 16-gauge extension cord creates severe electrical resistance that drops line voltage significantly. This voltage drop starves the compressor motor of power, causing it to hum, overheat, trip breakers, or damage internal start capacitors. By contrast, keeping the compressor plugged directly into a sturdy wall outlet protects electrical components from excessive heat and electrical failure.
Extending pneumatic hose length shifts the physical distance from the electrical grid to the compressed air delivery system. Air lines tolerate distance far better than light electrical cords, provided you account for minor friction losses along the internal hose walls. Even if line pressure dips slightly over long runs, your electrical breaker remains safe and the compressor pump cycles without motor strain. For this reason, professional workshops and jobsite crews almost universally recommend extending pneumatic hoses rather than stringing multiple extension cords across the floor.
Understanding Quick-Connect Coupler and Plug Profiles
Quick-disconnect fittings make joining two air hoses fast and convenient, but not all pneumatic connectors share the same geometry. In North America, the three primary styles include Industrial Interchange (often designated as I/M), Automotive Tru-Flate (designated as T), and ARO (designated as A). While these fittings all feature standard 1/4-inch NPT threads, their front plug nipples have distinct shapes and groove depths. Attempting to force an Automotive plug into an Industrial coupler can cause air hissing, improper locking, or sudden disconnection under working pressure.
Many modern workshops resolve this compatibility puzzle by using universal couplers or complete fitting assortments. Fitting kits like the WNCGC 15-piece air compressor set include multiple male and female plugs alongside universal push-in couplers designed to seat I/M, T, and ARO styles securely. Sticking to a single profile across all your air hoses and pneumatic tools eliminates confusion and guarantees clean seals. When purchasing fittings, always inspect the manufacturer stamped markings to confirm that the plug profile matches the coupler sleeve mechanism.
Choosing Between Rigid Threaded Splices and Quick-Disconnect Couplings
When connecting two air compressor hoses, you must choose between a permanent threaded splice and a modular quick-disconnect setup. A rigid splice uses a standard brass or steel male-to-male hex nipple that threads directly into the female ends of both air hoses. This threaded method creates a remarkably compact connection point that cannot accidentally pop loose when dragging hoses around corners or over rough gravel. However, separating the hoses requires two open-end wrenches, making it less convenient if you frequently store hoses on individual reels.
Quick-disconnect pairings offer unmatched versatility by placing a female quick coupler on the discharge end of the first hose and a male plug on the inlet of the second hose. This arrangement allows you to click the two lines together in seconds whenever extra reach is required. When the project wraps up, you can pull back the sliding sleeve, separate the lines, and coil each 25-foot or 50-foot hose independently. While quick connectors add slightly more weight and bulk to the joint, their daily convenience makes them the preferred choice for most home mechanics and DIY builders.
Utilizing Multi-Line Manifolds and Air Splitters
Sometimes extending your reach also involves operating more than one pneumatic tool at the same time. Installing a dedicated air manifold or line splitter allows a single air compressor output to supply two independent hoses simultaneously. Straight line splitters, such as the FORNAX 2-way manifold, feature an aluminum body with a 1/4-inch male plug on the inlet and two quick couplers on the outlets. This layout lets you run one line toward a tire inflation station while directing another hose toward an impact wrench or blow gun.
Manifolds with rotating joints offer additional mechanical relief when routing hoses across busy shop floors. Heavy-duty options like the XAQMHSW 2-way air hose splitter incorporate a 360-degree swivel mechanism crafted from nickel-plated steel with a 300 PSI working pressure rating. The rotating head relieves torsional strain on the hose ends, preventing tight loops, kinking, and premature fitting fatigue. Using a quality splitter enables modular workshop air distribution without requiring complex stationary piping installations.
Step-by-Step Procedure for Connecting Two Hoses with Quick Connectors
Safety must always take priority before assembling any compressed air hardware. Start by shutting down your air compressor and opening the tank drain valve or pulling the safety relief valve ring to vent all stored pressure completely. Never attempt to thread fittings or modify air lines while the system holds pressurized air, as accidental blowouts can launch hardware forcefully. Once the tank pressure gauge reads zero PSI, lay both air hoses flat on a clean workbench to inspect the end threads and rubber washers.
Next, prepare the threaded joints using proper sealing techniques to prevent frustrating air leaks. Wrap two to three tight layers of PTFE thread seal tape clockwise around the male threads of your brass fittings, ensuring the tape does not overhang the front opening where it could enter the airstream. Thread the female quick-connect coupler onto the terminal end of your primary hose and thread the male plug onto the intake end of your secondary hose. Tighten each fitting securely using two wrenches, with one holding the hose crimp collar and the other turning the hex fitting, avoiding over-torquing which can fracture brass threads.
Finally, align the male plug of the extension hose with the female coupler on your primary hose. Pull back the spring-loaded outer sleeve on the coupler, slide the plug firmly into the socket, and release the sleeve until it clicks forward into its locked position. Give the joined connection a firm physical tug to verify that the internal steel locking balls have fully seated in the plug groove. Once verified, close the tank drain, start the compressor to build working pressure, and listen closely along the junction to confirm a quiet, airtight seal.
How Hose Inner Diameter and Extended Length Impact Airflow and Pressure Drop
Linking two hoses together inevitably increases the internal friction experienced by traveling compressed air. While static pressure remains identical throughout an idle hose, dynamic pressure drops the instant you trigger a high-demand pneumatic tool. Standard 1/4-inch inner diameter hoses, such as the Hromee 25-foot hybrid air hose, provide excellent flexibility and lightweight handling for finish nailers and tire chucks. However, chaining multiple 1/4-inch lines together over 50 or 75 feet can generate noticeable friction loss that restricts total cubic feet per minute (CFM) output at 90 PSI.
Continuous-draw tools like dual-action rotary sanders, HVLP spray guns, and 1/2-inch impact wrenches suffer noticeably when connected to excessively long, narrow lines. If your project demands high continuous CFM delivery, consider using a larger 3/8-inch inner diameter hose for the primary supply line and attaching a shorter 1/4-inch whip line near the tool. This stepped configuration maintains higher volume across the long distance while preserving maneuverability at your hands. Matching internal hose diameter to your tool air consumption profile prevents frustrating power dips during demanding workshop tasks.
Hose Material Considerations When Coupling Lines
The materials composing your air lines dictate how smoothly your connected hose assembly handles across different temperatures and work environments. Traditional rubber hoses offer durability and lay flat readily, but their heavy weight makes coupled 50-foot runs cumbersome to drag across job sites. Hybrid polymer hoses combine the pliable flexibility of rubber with the lighter weight of PVC, maintaining pliability in temperatures ranging from sub-freezing cold up to hot summer heat. Units equipped with molded bend restrictors also protect the hose jacket from sharp crimping directly behind the crimped metal fittings.
Coiled pneumatic lines offer specialized advantages when used as secondary extension hoses for bench work or tire inflation. Lightweight coiled polyethylene lines, such as the 25-foot coiled hose with copper connectors, self-retract neatly to prevent messy loops from cluttering the floor. Similarly, polyurethane recoil extension adapters like the LUMITECO 9.8-foot hose adapter work exceptionally well at the end of a long main line to supply flexible mobility around vehicle tires. Choosing the right material combination keeps your coupled lines manageable, lightweight, and resistant to abrasive ground wear.
Preventing Accidental Hose Whip and Managing Jobsite Safety
A disconnected air hose under 90 to 125 PSI can whip violently across a workspace, presenting genuine hazards to personnel and nearby equipment. When joining two long hoses together, the midpoint coupler experiences friction and snagging whenever the line is pulled across floor thresholds or scaffolding. To mitigate disconnect hazards, choose quick-connect couplers featuring recessed sleeves or locking sleeve collars that cannot open when dragged over obstacles. Inspect the locking balls inside female couplers periodically to confirm they move freely without dirt accumulation or mechanical binding.
Contractors working on active construction jobsites frequently install safety whip checks across coupled hose joints. A whip check is a flexible braided steel cable that bridges the connection point, anchoring tightly to the hose bodies on either side of the fittings. If a coupler fails or disconnects unexpectedly, the safety cable restrains the thrashing hose ends, keeping the air line safely contained until the supply can be shut off. Always wear approved safety glasses when working around high-pressure pneumatic connections, and never use your fingers to check for suspected air leaks.
Troubleshooting Air Leaks and Connection Issues
An audible hiss coming from the junction between your two hoses indicates wasted energy and causes your compressor pump to cycle unnecessarily. The most common culprit is a damaged, dried, or missing rubber O-ring located deep inside the female quick coupler body. Over time, metal plug nipples can nick these internal rubber seals, preventing an airtight seal against the plug shoulder. If swapping to a fresh plug does not quiet the hiss, replacing the female coupler assembly typically resolves the issue immediately.
Leaking threads behind the quick fittings represent another frequent source of pressure loss along coupled lines. If thread sealant tape was applied counter-clockwise or stretched too thin, tightening the fitting can unravel the tape and create tiny escape channels. To pinpoint elusive leaks, spray a mild mixture of dish soap and water directly onto the pressurized fittings and observe where expanding bubbles form. Once identified, depressurize the lines completely, remove the fitting, clean the threads thoroughly, and reapply fresh PTFE tape before tightening again.
Special Applications: Connecting Air Lines to Water and Winterization Fittings
Compressed air hoses are frequently coupled with specialized plumbing adapters for seasonal home and recreational maintenance. Homeowners and RV owners routinely connect air lines to outdoor spigots, camper city water inlets, and underground lawn sprinkler manifolds to blow out residual water before winter freezes. Brass blowout adapters, such as lead-free quick-connect plugs from HHYOOSOO, ZKZX, or LitOrange, bridge standard 1/4-inch compressor lines to 3/4-inch Garden Hose Threading (GHT). This union allows compressed air to clear water lines efficiently, preventing cracked copper pipes and broken sprinkler heads.
Exercising strict pressure control is critical whenever adapting pneumatic hoses to residential water pipes or irrigation systems. Domestic plumbing systems and underground plastic drip lines are rarely rated to handle typical full compressor tank pressures of 120 to 150 PSI. Always dial your compressor line pressure regulator down to a safe range, generally between 30 and 50 PSI, before coupling the air hose to a blowout plug. Regulating pressure carefully ensures that your air lines clear trapped moisture without rupturing delicate PVC pipe joints or damaging internal valve diaphragms.
Daily Maintenance and Storage for Extended Hose Assemblies
Moisture accumulation inside air lines is an unavoidable byproduct of compressed air physics, especially across extended multi-hose setups. As air cools while traveling through long coupled hoses, moisture vapor condenses into liquid water droplets that settle along the bottom of the hose. To keep this water from reaching delicate pneumatic nailers or sprayers, drain your compressor tank daily using its quarter-turn brass ball valve or thumb petcock. Purging the tank and blowing clean air through both disconnected hoses after finishing work prevents internal corrosion and mold formation.
Proper storage practices extend the working lifespan of both your hoses and their attached brass connectors. Disconnect the two hoses after each workday rather than leaving them joined and under tension across the shop floor. Coil each hose loosely using an over-under technique to prevent internal spiral twists, which weakens the outer polymer jacket over time. Storing your disconnected fittings in a dry toolbox or protective compartment shields delicate sleeve springs and rubber seals from road grit, sawdust, and corrosive workshop chemicals.
Practical Takeaways for Long-Reach Pneumatic Setups
Connecting two air compressor hoses together remains the safest and most practical way to expand your working perimeter around homes, garages, and construction sites. By avoiding electrical extension cords, matching coupler profiles, applying thread sealant properly, and monitoring dynamic CFM pressure drop, you can run pneumatic tools reliably across any distance. Regular inspections of locking sleeves and daily moisture draining keep your coupled airlines safe, airtight, and ready for every heavy-duty workshop task.
About the author
Tony Carrick is an experienced product researcher and writer specializing in tools, home improvement, automotive maintenance, and consumer equipment. With extensive experience reviewing tools and tackling hands-on renovation projects, he brings a buyer-focused perspective to compressor performance, usability, and overall value.