
How to Use Tire Inflator Kit: Step-by-Step Guide for 2026
Learn how to use tire inflator kit steps to fix roadside punctures safely in October 2026, covering sealant injection, 12V compressors, and auto shut-off settings.
 By Tom Scalisi
Updated October 8, 2026
By Tom Scalisi
Updated October 8, 2026

A sudden dashboard tire pressure monitoring system warning or a visible tire sag on a cold morning can disrupt any commute within seconds. Modern roadside emergencies no longer require wrestling with a heavy hydraulic jack and a cumbersome spare tire on the shoulder of a busy highway. Learning how to use tire inflator kit hardware empowers drivers to address slow leaks, seal tread punctures, and restore proper driving pressure right from the curb. Portable 12V compressors and integrated repair packages combine rapid air delivery with emergency sealants or tire plugs to get vehicles moving again safely.
Operating these compact systems requires understanding proper electrical connections, accurate target pressure settings, and safe repair limits. Using an emergency kit incorrectly can cause blown vehicle fuses, improper tire seating, or dangerous under-inflation. Relying on verified vehicle door jamb placard specifications rather than guesswork ensures that every tire reinflation maintains vehicle handling and fuel efficiency. Whether you carry an all-in-one chemical sealant compressor or a mechanical plug kit, following a methodical process guarantees reliable performance when seconds count.
| Award | Product | ACR Score About ACR ScoreThe ACR Score is our own rating from 0 to 10, based on performance, design and build, ease of use, and value. It reflects independent research and is never influenced by manufacturers, retailers, or affiliate commissions. Learn more › | |
|---|---|---|---|
| Best Overall |
AIRMAN ResQ Pro+ Tire Repair Kit
|
9.2/10 | Buy |
| Best Value |
 Slime 40088 Portable 12V Tire Inflator
|
9.1/10 | Buy |
| Best Premium |
 Slime 50107 Flat Tire Puncture Repair
|
9.1/10 | Buy |
| Best Budget |
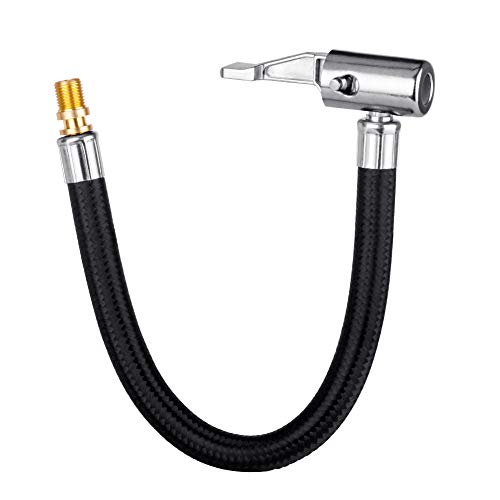 LUMITECO Locking Tire Chuck with Rubber Hose
|
8.9/10 | Buy |
 Tire Repair Kit, Tire Inflator Portable Air
|
8.8/10 | Buy | |
 FYPower 10 Pieces Air Accessories Kit with Tire
|
8.3/10 | Buy | |
 SUNSOUL Tire Inflator Portable Air Compressor
|
8.0/10 | Buy | |
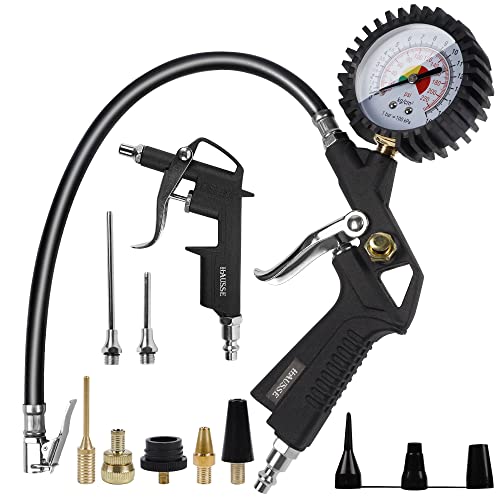 Hausse 1/4-Inch NPT Air Compressor Kit
|
7.8/10 | Buy |
Slime 40088 Portable 12V Tire Inflator
The Slime 40088 is a compact 12V portable tire inflator featuring Inflate Right automatic shut-off, an easy-to-read digital 99 PSI display, and emergency tubeless tire repair tools. It provides garage DIYers, commuters, and mobile equipment owners with a dependable roadside and driveway tire maintenance solution.
Pros
- Automatic shut-off helps prevent accidental tire over-pressurization during inflation cycles
- Clear digital pressure gauge reads up to 99 PSI for straightforward pressure setting
- Built-in LED work light enhances visibility around valve stems in dark roadside conditions
- Compact footprint makes it easy to store in a vehicle trunk, utility box, or garage shelf
- Includes heavy-duty emergency plug tools and tire repair strings for tubeless punctures
Cons
- Operates on 12V vehicle power, requiring a vehicle accessory socket rather than a standard 120V garage wall outlet
- Listed 6-minute inflation time is intended for routine passenger tire top-offs rather than high-volume continuous shop air
- Emergency tire repair plugs are suitable only for temporary punctures to reach a dedicated service facility
Hausse 1/4-Inch NPT Air Compressor Kit
This versatile accessory bundle combines an all-metal blow gun with a dial-gauge tire inflator designed for standard 1/4-inch NPT compressor connections. It is well suited for routine workshop maintenance, filling vehicle tires, and inflating sports gear.
Pros
- Durable, corrosion-resistant all-metal construction
- Gauge displays pressure even when unhooked from air
- Built-in release valve bleeds excess air easily
- Comprehensive accessory set fits bikes, tires, and balls
- Compatible with standard 1/4-inch NPT fittings
Cons
- Operating pressure capped at 140 PSI
- Analog dial gauge lacks digital precision
Step-by-Step Guide on How to Use a Tire Inflator Kit for Roadside Repairs
A roadside flat tire can turn an ordinary commute into an inconvenient and hazardous situation within moments. Understanding how to use tire inflator kit hardware properly transforms an intimidating mechanical breakdown into a manageable roadside task. Rather than waiting hours for a tow truck or risking personal safety changing a tire beside high-speed highway traffic, modern portable inflation systems allow drivers to resolve tread punctures and pressure drops quickly. Mastering the correct operational sequence ensures that both the mechanical repair and pneumatic reinflation remain safe, effective, and durable.
Selecting the Right Repair Method: Chemical Sealants vs Plugs and Nails
Tire repair kits generally utilize one of three primary sealing methodologies to stop air loss. Chemical foam or liquid sealant systems, such as those found in the AIRMAN ResQ Pro+ Tire Repair Kit and Slime 50107 Flat Tire Puncture Repair, inject a liquid compound directly through the tire valve stem before inflation. As the tire rolls, centrifugal force distributes the sealant across the inner liner to seal punctures up to a quarter of an inch. These chemical solutions offer maximum convenience because they require no physical extraction of the puncturing object or manual reaming of the tread hole.
Mechanical string plug kits represent an alternative approach favored by drivers seeking a durable physical seal. Kits like the Slime 40088 Tire Inflator and the heavy-duty set included with the TILIBOTE Tire Repair Kit supply T-handle reamers, insertion needles, and vulcanizing rubber strings. These tools require pulling the puncturing screw or nail, reaming the channel, and forcing a tacky rubber string into the carcass. Alternatively, screw-in rubber repair nails like those provided with the SUNSOUL Tire Inflator Portable Air Compressor offer a quick-threading option that installs with a screwdriver.
Assessing Puncture Damage and Confirming Cold Placard Pressure
Before unpacking your compressor, you must confirm that the tire damage is actually repairable on the roadside. Safe emergency repairs are strictly limited to punctures located within the central tread crown of the tire. Any cut, tear, or puncture situated on the sidewall, shoulder, or bead area compromises the structural integrity of the tire carcass. Attempting to seal or inflate a tire with sidewall damage creates an immediate blowout hazard that no portable roadside kit can safely resolve.
Once you confirm the tread puncture is repairable, verify the target inflation pressure on the vehicle tire information placard. This factory label is permanently attached to the driver side door jamb, B-pillar post, or fuel door. Never inflate your tires to the maximum pressure stamped on the tire sidewall, as that number represents the absolute structural limit under maximum vehicle load. Inflating to the manufacturer cold pressure specification, typically between 30 and 36 PSI for passenger vehicles, maintains proper handling, braking grip, and fuel efficiency.
Powering the Inflator: 12V Auxiliary Sockets and Battery Guidelines
Portable tire inflators typically draw electrical power from 12V DC vehicle auxiliary sockets or integrated rechargeable lithium batteries. When using a 12V corded compressor, you should always start the vehicle engine and allow it to idle before powering on the pump. Running the engine maintains a stable 13.8V to 14.4V charging voltage across the electrical system, preventing the high-draw compressor from draining your starter battery. Idling also provides optimal voltage to the compressor motor, ensuring faster inflation times and reducing electrical strain.
Vehicle auxiliary power outlets are protected by interior fuses usually rated at 10 to 15 amperes. High-torque air compressor motors draw substantial electrical current, especially when starting against existing line backpressure. If an inflator motor pulls more current than the circuit can support, the vehicle fuse will blow instantly and disable the outlet. Keeping the air chuck detached until the pump motor begins spinning can reduce startup inrush current and protect delicate vehicle wiring circuits.
Sealing the Leak: Step-by-Step Chemical Sealant and Plug Insertion
When using an all-in-one chemical repair kit, position the vehicle so the puncture sits near the bottom half of the wheel rotation. Remove the valve stem dust cap and connect the sealant canister hose directly to the Schrader valve. Many modern systems feature through-valve formulas that do not require removing the delicate inner valve core. Connect the compressor air supply hose to the sealant canister inlet, following product flow markings to route liquid into the tire before pressurized air follows.
For kits requiring manual valve core removal, utilize the included four-way valve stem tool to unthread the brass core counterclockwise. Allow residual air to escape completely while keeping the small valve core clean from road grit. Squeeze the prescribed volume of sealant into the stem channel using the flexible filler tube, then carefully thread the valve core back into place until snug. Over-tightening the valve core can strip internal brass threads, so apply gentle finger-tight torque using the specialized notch tool.
If utilizing a traditional string plug kit, extract the offending screw or nail using pliers to expose the puncture channel. Immediately insert the spiral T-handle reaming tool into the hole, twisting and pushing to clean dirt and scuff the steel belt edges. Thread a sticky vulcanizing rubber string through the eyelet of the needle tool and plunge it straight into the puncture until two-thirds enters the tire. Pull the needle handle straight out without twisting, leaving the rubber plug seated in the tread before trimming excess length flush.
Connecting the Air Hose: Threaded Chucks vs Lock-On Adapters
Connecting the compressor hose to the tire valve stem requires a tight, leak-free pneumatic seal. Standard inflator hoses feature threaded brass chucks that screw directly onto the outer threads of the Schrader valve. While threaded brass provides exceptional retention that cannot pop off under high pressure, unscrewing it can prove awkward. Drivers often lose two to three PSI of freshly pumped air as they fumble to unthread the fitting from the spinning valve stem.
Quick-release thumb-lock chucks and specialized adapters provide a faster alternative for roadside inflation. Accessories like the LUMITECO Locking Tire Chuck with Rubber Hose screw onto standard twist-on hoses to convert them into instant locking mechanisms. Pressing the clamp head squarely onto the valve stem and flipping the thumb lever engages internal rubber seals instantly. When inflation concludes, a simple flip of the lever releases the chuck cleanly with virtually zero air loss.
Setting Target PSI and Managing Auto-Shutoff Inflation
Modern tire inflators feature digital displays with integrated automatic shutoff controls that eliminate pressure guesswork. After powering on the display, select the appropriate measurement unit, which is typically PSI for domestic passenger vehicles. Use the plus and minus buttons to preset your target pressure according to your vehicle placard specification. Many digital gauges offer preset profiles for cars, motorcycles, and bicycles, so verify that your unit is set to the correct automotive mode.
Once you connect the hose chuck to the valve, the digital screen will display the current static pressure inside the tire. Press the master compressor power switch to activate the reciprocating piston and begin air delivery. The pressure reading shown during active pumping will fluctuate slightly higher than true tire pressure due to continuous line backpressure. High-precision digital microprocessors account for this dynamic resistance and automatically halt the motor once the internal chamber reaches your preset target.
Compressor Duty Cycles and Thermal Overload Prevention
Compact portable air compressors generate intense heat within their reciprocating piston cylinders during operation. Because these miniature pumps lack large oil sumps and heavy cooling fans, they have strict duty cycle limitations. Most portable 12V inflators are rated for a maximum continuous runtime of ten to fifteen minutes before requiring rest. Exceeding this duty cycle causes thermal saturation that can melt internal seals, warp composite piston rings, or scorch motor windings.
If you need to inflate a completely flat tire or service multiple low tires consecutively, plan scheduled cooling intervals. Allow the compressor housing to rest with the motor turned off for at least ten minutes between extended inflation cycles. Extreme operating temperatures also affect the high-pressure rubber hose and brass fittings connected to the cylinder head. Always grip the hose by its insulated rubber sleeve or wear work gloves when disconnecting fittings after extended use.
Post-Inflation Checks, Temporary Driving Limits, and Diagnostics
Once inflation stops and you disconnect the air chuck, immediately verify the final resting pressure. Digital inflator gauges are generally accurate within one PSI, but dynamic motor vibration can occasionally introduce minor display variance. Utilizing a standalone mechanical dial gauge or calibrated digital pocket gauge provides an independent cross-check of resting pressure. Install the protective valve stem dust cap promptly to prevent road salt and grit from contaminating the Schrader valve spring mechanism.
Emergency chemical repairs require immediate vehicle motion to distribute the sealant compound effectively across the tread. Drive the vehicle at moderate speeds, staying below 45 to 50 miles per hour for the first two to four miles. This rolling action forces the liquid formula into remaining micro-channels around the puncture site, establishing a solid pneumatic barrier. After driving this initial calibration distance, pull over in a safe parking area to recheck tire pressure and ensure the seal holds firm.
Drivers must treat chemical sealant and roadside plug repairs as temporary emergency solutions, not permanent fixes. Sealant formulas like those produced by Slime are specifically engineered to remain in passenger tires for a maximum of three days or one hundred miles. Leaving chemical sealants inside a wheel longer can corrode delicate Tire Pressure Monitoring System sensors or harden into an unbalanced mass on the rim. Schedule a visit to a professional tire service facility promptly to have the tire demounted, inspected internally, and permanently patched.
Kit Maintenance, Sealant Expiration, and Vehicle Trunk Storage
A roadside repair kit is only dependable if its components remain functional through months of vehicle storage. Liquid tire sealants carry finite shelf lives, generally expiring within four to eight years from their manufacturing date. Over time, chemical carrier agents can separate, gel, or lose their vulcanizing properties, rendering the formula ineffective during an emergency puncture. Check the expiration date stamped on your sealant bottle annually and replace expired canisters to maintain roadside preparedness.
Vehicle trunks experience brutal temperature extremes, fluctuating from sub-freezing winter lows to blistering summer heat exceeding 140 degrees Fahrenheit. These thermal swings degrade rubber hoses, cause vulcanizing plug strings to dry out, and accelerate lithium battery degradation. Inspect your kit semi-annually, confirming that rubber hose jackets show no dry rot and that string plugs remain tacky within their protective foil packaging. If carrying a cordless compressor, connect it to a USB-C charging source every three months to keep battery cells healthy.
Mastering the proper application of a tire inflator kit ensures you can handle unexpected punctures calmly and efficiently without jeopardizing vehicle safety. Always prioritize vehicle door placard specifications over sidewall maximums, observe manufacturer continuous duty cycle limits, and verify tire pressure with an independent gauge. By maintaining your emergency kit hardware and adhering to temporary repair distance limits, you ensure reliable mobility through every roadside contingency.
About the author
Tom Scalisi brings more than two decades of experience in construction, building maintenance, contracting, and hands-on tool use. His practical understanding of power tools, automotive work, repairs, and jobsite equipment helps readers evaluate compressors based on real workloads rather than specifications alone.