
How to Put Together an Air Compressor Hose: Practical Guide for 2026
Learn how to put together an air compressor hose with leak-free fittings, durable couplers, and proper thread sealant in this October 2026 guide.
 By Kenny Koehler
Updated October 8, 2026
By Kenny Koehler
Updated October 8, 2026
Setting up a reliable pneumatic air line requires more than just connecting random fittings from a hardware bin. A loose fitting or an improperly taped thread can leak air constantly, forcing the compressor pump to cycle continuously and wasting tank pressure. Knowing how to put together an air compressor hose ensures your pneumatic setup maintains full working pressure from the tank manifold directly to your nailer, impact wrench, or tire inflator. Whether you are assembling a hybrid whip line or configuring a primary workshop hose, choosing appropriate quick-connect fittings and using proper thread sealant makes an immediate difference. If you are setting up your workspace for the first time, reviewing our guide on choosing an air compressor for home use will help you align your air supply with your workshop demands.
Air hoses endure constant physical dragging across concrete floors, sharp pressure surges, and continuous movement during active shop projects. Using mismatched NPT threads, low-grade couplers, or skipping bend restrictors will cause premature hose cracking and frustrating air leaks right at the tool connection. Taking the time to assemble each component properly protects your pneumatic tools from pressure drops and keeps air delivery steady. If you operate air-demanding tools like sanders or paint sprayers, pairing your hose assembly with our air tool compressor sizing guide ensures you achieve adequate CFM without straining your pump. With the right fittings, thread tape, and wrenches on hand, building a leak-free air hose takes only a few minutes.
| Award | Product | ACR Score About ACR ScoreThe ACR Score is our own rating from 0 to 10, based on performance, design and build, ease of use, and value. It reflects independent research and is never influenced by manufacturers, retailers, or affiliate commissions. Learn more › | |
|---|---|---|---|
| Best Overall |
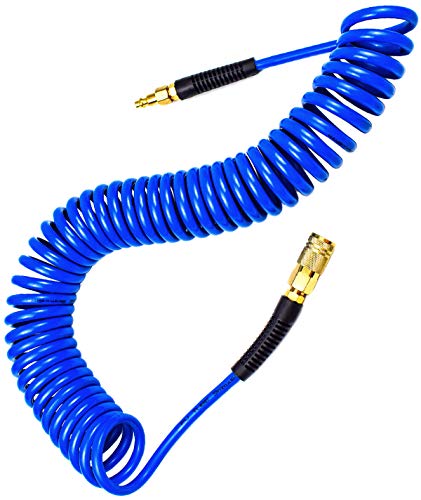
YOTOO Polyurethane Recoil Air Hose
|
9.2/10 | Buy |
| Best Budget |
 LUMITECO Quick Connect Tire Chuck Hose
|
8.8/10 | Buy |
 13 Pcs 2-Way Connection Air Nozzle Blow Gun Set
|
8.8/10 | Buy | |
| Best Premium |
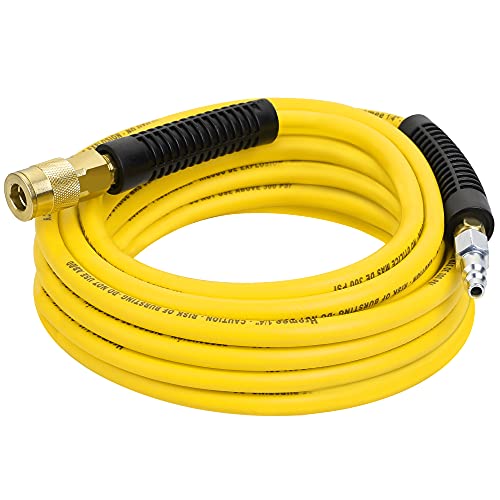 Hromee Air Compressor Hose 1/4 Inch x 25 Feet
|
8.6/10 | Buy |
 FYPower 18 Pieces Air Compressor Accessories Kit
|
8.6/10 | Buy | |
 LUMITECO 9.8 FT Extension Recoil Air Hose Adapter
|
8.4/10 | Buy | |
| Best Value |
 YELUN Brass RV Winterizing Blowout Kit
|
8.4/10 | Buy |
 Hromee Hybrid Lead-in Air Hose 3/8 Inch x 6FT
|
8.4/10 | Buy | |
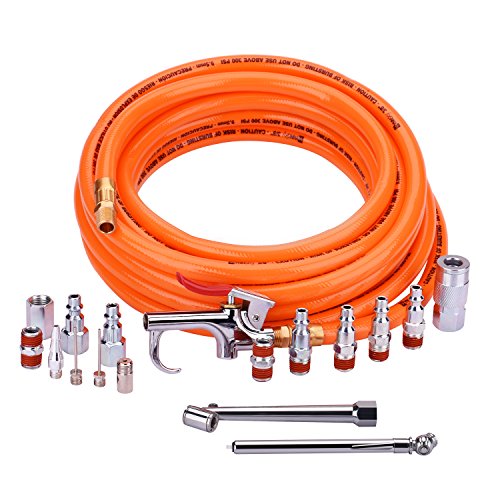 WYNNsky 3/8" X 25ft PVC Air Compressor Hose Kit
|
8.4/10 | Buy | |
 LUMITECO 2-Pack Ball Foot Air Chuck Set
|
8.1/10 | Buy |
Complete Step-by-Step Guide to Assembling an Air Compressor Hose
Putting together a pneumatic line is an essential task for any garage owner, woodworker, or contractor setting up air power. A correctly assembled hose preserves consistent air pressure, eliminates costly energy loss from compressor cycling, and keeps your pneumatic tools running at their intended power ratings. Whether you are assembling raw bulk hose with custom brass fittings or outfitting a pre-cut length with quick-disconnect couplers, following a structured process guarantees a leak-free connection. Taking a methodical approach ensures your air line withstands regular mechanical stress, high working pressures, and demanding workshop environments.
Understanding Air Hose Anatomy and Thread Standards
Standard pneumatic systems rely on National Pipe Taper (NPT) threads to establish mechanical joints between hoses, couplers, and tools. Most consumer and light commercial compressors utilize 1/4-inch NPT fittings, although larger workshop systems frequently run 3/8-inch lines for increased volume. The tapered design of NPT threads means the diameter narrows slightly along the length of the thread, allowing the mating surfaces to wedge together as you turn them. This mechanical wedging action provides physical retention, but the metal-to-metal spiral path still requires an effective thread sealant to prevent pressurized air from escaping.
Air hose connections generally divide into two distinct functional ends: the supply connection and the tool connection. The end connecting to your compressor tank typically receives a male quick-connect plug, allowing you to click directly into the compressor female outlet coupler. Conversely, the working end of the hose normally receives a female quick-connect coupler, which seals shut automatically when disconnected and opens only when mated to an air tool plug. Quick-connect couplers also feature distinct interchange profiles, with the Industrial or I/M profile being the standard choice for smooth engagement and long-term mechanical reliability across most workshops.
Selecting the Right Hose Material and Diameter
Choosing the proper hose material determines how your pneumatic assembly handles in different working temperatures and environments. Traditional rubber hoses offer superb durability, stay flexible in freezing conditions, and lay completely flat on workshop floors, though their heavier weight can cause arm fatigue during elevated work. Hybrid polymer hoses, such as the Hromee hybrid lines, combine rubber flexibility with lightweight PVC characteristics, resisting severe kinks and maintaining suppleness from sub-zero temperatures up to 150 degrees Fahrenheit. Polyurethane recoil hoses, like the YOTOO self-coiling models, excel in tight workbenches and tire inflation bays because they automatically spring back out of the way when released.
Hose internal diameter directly dictates the volume of compressed air delivered to your pneumatic tools. A 1/4-inch inner diameter hose works well for intermittent, low-demand tools like brad nailers, tire inflators, and blow guns, offering exceptional maneuverability and low weight. Continuous tools like dual-action sanders, paint sprayers, and half-inch impact wrenches demand higher CFM volumes that can choke inside a 1/4-inch line, creating noticeable dynamic pressure drop. When setting up extended runs or pairing lines with budget air compressor options, upgrading to a 3/8-inch hose minimizes flow restriction and helps smaller pumps sustain necessary working pressure at the tool.
Essential Tools and Hardware Preparation
Assembling an air compressor hose requires only a small selection of hand tools and sealing supplies. You will need two properly sized open-end wrenches or adjustable wrenches to hold the hose end fitting while tightening the coupler or plug. Using two wrenches simultaneously prevents the hose from twisting, kinking, or tearing internally while you apply torque to the metal threads. A fresh roll of high-density PTFE thread seal tape is indispensable for wrapping the male threads before assembling the joint.
If you are building an assembly from bulk hose stock rather than a pre-crimped hose, you also need sharp hose shears and proper hose barbs with clamps or ferrules. Pre-crimped hoses, like the WYNNsky PVC kit or Hromee hybrid hoses, come manufactured with solid brass 1/4-inch male NPT ends and bend restrictors already attached, making final assembly much simpler. Having a brass female coupler, a hardened steel male quick-connect plug, and a bottle of mild soapy water on hand rounds out everything required for a professional, leak-proof build.
Applying Thread Sealant and Prepping Fittings
Proper thread preparation represents the single most crucial step in preventing annoying hiss leaks around your fittings. Inspect the male NPT threads on your hose end or fittings to confirm they are clean, dry, and free of machining burrs or metal shavings. If you are reusing existing brass fittings, scrape away any remnants of old, dried pipe dope or shredded tape using a stiff nylon brush. Clean metal surfaces allow the new sealant to compress uniformly into the thread roots, creating a continuous barrier against escaping compressed air.
Wrap the male threads with PTFE thread tape in the proper clockwise direction when looking directly into the open end of the fitting. Wrapping clockwise ensures that as you thread the female coupler or fitting onto the hose, the tightening motion pulls the tape tighter around the threads rather than unravelling it. Apply three to four firm wraps of tape, stretching it slightly so it settles cleanly into the thread grooves without bunching up. Leave the first lead thread bare of tape so loose fragments cannot shear off and migrate downstream into sensitive tool valves or pressure regulators.
Step-by-Step Installation of Couplers and Plugs
Begin your assembly by attaching the fittings to the supply end of your air hose. Take the male quick-connect plug that connects to your compressor and thread it by hand into the female NPT fitting of the hose, or thread the pre-crimped male hose end into a female-threaded fitting. Hand-tighten the joint first to verify that the threads engage smoothly and are not cross-threading. Once the fitting is hand-snug, place one wrench on the hose hex ferrule to steady the line and place the second wrench on the plug hex body.
Tighten the connection with smooth, deliberate pressure, turning the plug approximately two to three full turns past hand-tight. Because NPT threads are tapered, overtightening brass can crack the female casting or strip the softer threads, while undertightening will allow air to weep past the sealant. Move to the opposite end of the hose to install the working female quick-connect coupler, threading it onto the prepared male end by hand before securing it with your two wrenches. Ensure that the outer sliding sleeve of the quick coupler moves freely and does not bind against the hose body or bend restrictor after tightening is complete.
Integrating Lead-In Whip Hoses and Bend Restrictors
Directly attaching rigid couplers to your main air hose can subject the fitting connection to severe bending fatigue during daily shop tasks. Molded rubber or polyurethane bend restrictors, such as those found on YOTOO and Hromee hoses, reinforce the first few inches behind the brass ferrule to distribute bending forces across a wider curve. This added reinforcement prevents the hose wall from pinching shut or developing stress fractures where the flexible material meets the rigid metal barb. If your bulk hose lacks molded restrictors, slip aftermarket spiral sleeves over the ends before threading your fittings.
For heavy pneumatic tools like impact wrenches or vibrating air hammers, adding a short lead-in whip hose provides immense mechanical benefits. A dedicated six-foot whip hose, like the Hromee 3/8-inch hybrid lead-in line, absorbs intense tool vibration before it reaches your primary hose reel or quick-connect couplers. This vibration dampening prevents premature wear on coupler detent balls and reduces the heavy drag weight tugging on your wrists while working. Connecting a lead-in hose also keeps rigid metal couplers away from your hands, improving ergonomic comfort during extended projects.
Pressurizing the Line and Testing for Leaks
Testing your newly assembled air line under pressure is the only reliable way to confirm that all joints are sealed completely. Plug the male end of your hose into the compressor tank manifold while the system is powered off, ensuring the quick-disconnect sleeve snaps forward securely into its locked position. Power on the compressor and let it build pressure until the pressure switch automatically reaches its cut-out setting, which is typically between 120 and 150 PSI on consumer units. Observe the tank pressure gauge to ensure the regulator delivers working pressure into your newly attached line.
Mix a small batch of dish soap and warm water in a spray bottle or dab it onto the threaded connections with a small brush. Watch the joints closely for several minutes; any expanding soapy bubbles indicate a slow leak where air is channeling through the thread sealant. If bubbles appear, shut down the compressor, vent all stored line pressure completely, and snug the leaking fitting another quarter turn with your wrenches. If your workshop setup includes extended piping or you plan on adding an auxiliary air tank, running this bubble test across every connection preserves your stored air volume and prevents unnecessary pump cycling.
Configuring End Attachments and Avoiding Common Mistakes
Once your main hose assembly holds pressure reliably, you can outfit your air tools and accessories with matching quick-connect plugs. Air blow guns, such as the 13-piece SARDVISA kit, typically feature 1/4-inch female NPT threads in their handle bases that accept standard male plugs. Apply the same three wraps of PTFE tape to each tool plug before threading it into the tool body, tightening securely with two wrenches. Having dedicated plugs installed on each tool allows you to swap between a blow gun, tire chuck, and nailer in seconds without losing line pressure.
Tire inflation setups benefit greatly from specialized quick-connect accessories, such as LUMITECO closed-flow ball foot chucks or flexible tire chuck extension hoses. Closed-flow chucks contain an internal shut-off valve that halts airflow until the chuck is firmly pressed onto a valve stem, preventing wasted air while maneuvering between vehicle tires. When connecting any new accessory, avoid common mistakes like overtightening brass threads or forgetting thread sealant on male fittings. Checking the internal rubber O-ring inside your female couplers ensures reliable sealing without needing excessive wrench force.
Maintenance, Moisture Control, and Safe Storage
Maintaining your air compressor hose assembly requires simple habits that dramatically extend the lifespan of your fittings and hose material. Always depressurize the air line before disconnecting your hose from the compressor manifold or storing it away for the day. Leaving hoses under continuous high pressure stretches the internal reinforcement braiding and accelerates dry rot or micro-cracks in PVC and rubber compounds. Pull back the quick coupler sleeve while firmly holding the mating tool to prevent loose hoses from whipping violently under residual air pressure.
Store your assembled hose in loose, wide loops on a dedicated wall bracket or inside a hose reel rather than hanging it over sharp hooks or nails. Sharp bends pinch the internal tube, degrading air delivery volume and creating permanent kinks that restrict airflow during future use. Additionally, keep your hose off greasy garage floors and away from direct sunlight, as petroleum spills and ultraviolet radiation break down polyurethane and PVC covers over time. Purging moisture from your compressor tank daily also keeps water out of the hose interior, preventing internal rust from fouling your quick couplers.
Assembling an air compressor hose with quality brass couplers, correct thread sealant, and proper tightening techniques gives you a dependable, high-performing pneumatic line. Taking the time to select the right hose material and testing your connections under working pressure eliminates frustrating leaks and protects your pneumatic equipment. With a properly assembled hose supplying clean, unrestricted air, your nailers, inflators, and shop tools will deliver consistent power every time you power up your compressor. Consistent care and smart storage ensure your custom pneumatic line delivers years of dependable service in any home workshop or jobsite environment.
About the author
Kenny Koehler is a power-tool specialist with more than a decade of hands-on evaluation experience and a science-based approach to product testing. His expertise in repeatable testing, tool performance, impact wrenches, and professional equipment brings a practical, data-focused perspective to compressor and pneumatic-tool comparisons.