
How to Drain an Air Compressor: Step-by-Step Maintenance Guide for 2026
Learn how to drain an air compressor safely in October 2026 to remove rust-causing moisture, protect pneumatic tools, and extend tank service life.
 By Bob Beacham
Updated October 8, 2026
By Bob Beacham
Updated October 8, 2026

Atmospheric moisture naturally accumulates inside steel air tanks every time a pneumatic pump compresses ambient air. As warm compressed air cools against the interior walls of the receiver tank, water vapor condenses into liquid condensate that settles directly at the lowest point of the vessel. Without a regular maintenance routine, this acidic moisture mixture corrodes internal welds, washes away essential air tool lubrication, and severely degrades downstream pneumatic performance. For comprehensive preventative maintenance, pairing this draining routine with effective moisture prevention strategies ensures your entire airline setup remains dry and reliable.
Understanding how to drain an air compressor correctly prevents catastrophic tank wall thinning and protects sensitive pneumatic equipment from moisture-induced failure. Whether your garage setup relies on a standard brass thumb petcock, an extended lever-actuated ball valve, or a programmable electronic auto-drain solenoid, purging moisture must become a daily habit. Taking a few moments to release stored condensation protects expensive tools like framing nailers, HVLP spray guns, and impact wrenches from premature internal wear. This practical walkthrough explains the exact operational steps, necessary safety precautions, and hardware upgrades required to keep your air tank completely moisture-free.
| Award | Product | ACR Score About ACR ScoreThe ACR Score is our own rating from 0 to 10, based on performance, design and build, ease of use, and value. It reflects independent research and is never influenced by manufacturers, retailers, or affiliate commissions. Learn more › | |
|---|---|---|---|
| Best Overall |
HK Extended Tank Drain Assembly Kit with 10 Inch
|
9.2/10 | Buy |
| Best Premium |
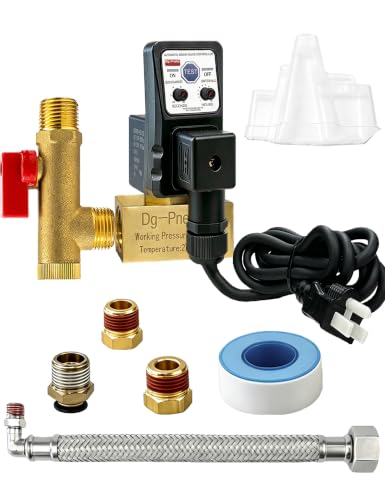 Compressor auto drain timer valve, 1/4, 3/8
|
9.2/10 | Buy |
| Best Budget |
 SUNROAD Air Compressor Valve ,Ball Type Drain
|
9.1/10 | Buy |
| Best Value |
 Hromee Extended Tank Drain Assembly Kit with 10
|
8.9/10 | Buy |
 Air Compressor Drain Valve
|
8.6/10 | Buy | |
 Ingersoll Rand 54410931 EDV200 1/4" NPT Electronic
|
8.4/10 | Buy | |
 Extended Tank Drain Valve Assembly Kit for Air
|
8.3/10 | Buy | |
 QWORK Automatic Timed Condensate Drain Valve 1/2"
|
8.3/10 | Buy | |
 Automatic Electronic Tank Drain Kit
|
8.3/10 | Buy | |
 HVAC Drain Line Blow Out Tool
|
8.0/10 | Buy |
Complete Guide to Air Compressor Tank Condensation Removal
The Thermodynamics of Tank Condensation and Corrosion Risks
Compressed air systems naturally generate water because atmospheric air contains moisture that cannot remain vaporized when compressed into a smaller volume. As the compressor pump pulls in ambient air and pressurizes it, the temperature of the air rises significantly inside the pump cylinders. When that hot compressed air moves into the steel receiver tank, it begins to cool against the metal walls. Cooling causes the air to drop below its dew point, forcing water vapor to condense into liquid that collects at the base of the tank.
Allowing liquid water to sit in the tank creates an aggressive environment for internal rust and metal oxidation. Factory steel tanks are subjected to continuous pressure cycles, and moisture pooling along bottom weld seams gradually weakens the structural thickness of the metal. If left neglected over several seasons, internal corrosion can cause microscopic pinhole leaks or even catastrophic tank failure under high operating pressure. When evaluating different equipment options, our practical guide to choosing an air compressor covers how tank build quality and vessel design impact long-term maintenance needs.
Trapped moisture also escapes into downstream airlines whenever tools draw air from the tank discharge port. Water droplets traveling through rubber hoses wash out factory lubricants from pneumatic nailers, air ratchets, and rotary impact wrenches. In spray finishing tasks, moisture contamination produces bubbling, fisheyes, and poor paint adhesion on workpieces. Regularly removing water from the bottom of the receiver tank protects both the pressure vessel and every air tool connected to the system.
Step-by-Step Manual Draining for Workshop and Jobsite Tanks
Performing a manual drain starts with proper safety preparation and pressure management. Never attempt to open a factory drain valve while the tank is fully pressurized to its maximum shut-off limit of 150 or 175 PSI. Opening a valve under full pressure expels condensed water at extreme velocity, creating a hazardous spray of rusty liquid and loud noise. Always put on safety glasses and hearing protection before approaching the tank base to prevent eye injury from expelled debris.
Begin by turning off the compressor motor and disconnecting the power cord from the electrical outlet. Use an air blow gun or pull the safety relief valve ring gently to bleed system pressure down to approximately 10 to 20 PSI. Maintaining this modest residual pressure provides just enough kinetic force to blast settled sludge and water out of the port without creating violent splashing. Place a low-profile collection pan, bucket, or heavy shop towel directly beneath the drain outlet.
Slowly turn the drain valve counterclockwise to begin releasing the trapped condensation. Liquid water mixed with brown rust scale and pump oil residue will discharge into your catch basin. For portable units such as pancake, hot dog, or twin-stack compressors, tilt the unit gently toward the drain port to ensure standing pools clear completely. Keep the valve open until the hissing air stream transitions from a moist sputter to clean, dry air.
Once the liquid discharge ceases, close the valve securely by turning it clockwise until it forms a tight air seal. Take care not to overtighten small factory thumb petcocks, as excessive torque can snap delicate brass threads inside the tank bung. Restore the compressor to its upright position and inspect the port area for any continuing hisses that might indicate an incomplete seal. Disposing of the collected oily condensate in an environmentally responsible manner completes the manual maintenance cycle.
Factory Petcocks Versus Upgraded Quarter-Turn Ball Valves
Most consumer compressors ship from the factory with basic brass needle-style thumb petcocks. These compact fittings feature small wings that require tedious hand-turning in awkward, restricted spaces beneath the tank. Over time, moisture and rust particles cause the internal threads of factory petcocks to corrode and seize. Many workshop owners end up avoiding regular maintenance simply because reaching and turning a stiff thumb petcock hurts their fingers.
Upgrading to a dedicated quarter-turn mini brass ball valve eliminates nearly all of the friction associated with manual draining. Ball valves utilize a polished internal brass sphere with a central bore that opens or closes completely with a simple 90-degree handle rotation. Unlike threaded needle valves, quality ball valves operate without vulnerable internal rubber O-rings that can dry out and tear under repeated pressure exposure. The extended lever handle provides clear visual confirmation of whether the valve is completely closed or fully open.
For vertical garage tanks or low-clearance compressors, extended drain assembly kits offer the ultimate manual upgrade. These kits combine a 10-inch flexible braided stainless steel hose with a heavy-duty ball valve and a 90-degree brass elbow. Threading the steel hose into the bottom tank port moves the shut-off lever out to the front or side of the compressor base. Installing an extended drain kit allows operators to purge water effortlessly without kneeling on the floor or reaching beneath hot machinery.
Installing and Calibrating Automatic Electronic Drain Valves
Automating the condensation removal process ensures consistent tank protection without relying on manual memory. Electronic timed drain valves utilize an integrated electric solenoid mechanism coupled to an adjustable digital or analog timer module. Every time the timer reaches its programmed interval, the solenoid valve energizes, opening a direct discharge passage for several seconds before sealing shut. This automated cycle expels collected moisture continuously while the compressor operates throughout the workday.
Installing an automatic timer valve requires matching the fitting threads to your compressor tank drain bung. Most units feature a standard 1/4-inch NPT connection, while included brass bushings allow adaptation to 3/8-inch or 1/2-inch ports. Thread seal tape must be applied carefully to male threads before wrench-tightening fittings to guarantee leak-free performance under high tank pressures. The valve assembly then plugs into a standard 110V or 120V grounded workshop outlet located near the compressor station.
Calibrating the timer controls depends heavily on ambient humidity and shop operating conditions. Most electronic valves feature dual dials: an OFF interval dial adjustable from 0.5 to 45 or 50 minutes, and an ON discharge dial adjustable from 0.5 to 10 seconds. In dry winter months, setting the timer to open for two seconds every 30 minutes prevents unnecessary air waste while purging light condensate. During humid summer periods, shortening the interval to every 10 or 15 minutes prevents standing water from accumulating along the tank base.
Routine maintenance keeps automatic solenoid drain valves functioning reliably year after year. Installing an inline brass strainer or ball valve filter upstream of the solenoid prevents rust scale from lodging inside the valve seat. Operators should press the manual test button weekly to verify electrical power and confirm that the discharge orifice opens cleanly. Periodically disassembling and cleaning the internal strainer screen removes accumulated sludge before it can cause valve sticking.
Moisture Purge Frequency Across Different Air Demand Applications
Determining how often to drain an air compressor depends primarily on how frequently the equipment runs and the relative humidity of the workspace. Hobbyists using small portable compressors for occasional tire inflation or brad nailing should drain the tank immediately after each work session. Leaving compressed air and condensation inside a cold storage shed accelerates internal tank corrosion between infrequent projects. Opening the drain valve before storing the compressor ensures moisture never sits stagnant inside the vessel.
Automotive repair shops and professional carpentry crews cycling compressors daily require a more rigorous maintenance schedule. In active workshops, draining the receiver tank at the end of every operating shift is considered standard operating practice. High air demand causes the pump to cycle repeatedly, drawing in vast volumes of atmospheric air and rapidly multiplying condensate accumulation. Reviewing an air compressor CFM and PSI chart helps operators evaluate how continuous tool consumption correlates with higher moisture production rates.
Continuous-duty industrial applications such as sandblasting, abrasive grinding, and automated manufacturing demand constant drainage solutions. When air tools operate continuously, receiver tanks can accumulate several pints of liquid water in just a few hours. In these demanding environments, relying on manual draining at the end of the day leaves tools vulnerable to moisture wash-out mid-shift. Utilizing automated timed valves or zero-air-loss electronic drains is the most reliable strategy for continuous commercial facilities.
Clearing Stuck Drain Valves and Sludge Blockages
A common frustration occurs when an operator opens the drain valve, but neither water nor air escapes from the port. This blockage happens when heavy rust sediment, dried scale, and thickened compressor oil combine to form a dense sludge plug at the tank bottom. Because the drain port sits at the lowest gravitational point, settled debris naturally migrates toward the narrow 1/4-inch orifice. Ignoring a clogged valve creates a false impression that the tank is dry when it may actually harbor gallons of trapped water.
Never use sharp metal drill bits or power tools to force open a clogged drain fitting on a pressurized tank. Instead, depressurize the receiver tank completely by pulling the ASME safety relief valve ring until the pressure gauge reads zero PSI. Once the tank contains zero pressure, unthread the drain valve assembly carefully using an appropriately sized wrench. Inspect the opening and use a piece of stiff brass wire or a wooden dowel to gently probe and dislodge the sludge cake inside the bung.
After clearing the blockage, flush the tank by briefly running the compressor with the drain port open to blow residual sediment outward. Specialty pneumatic tools, such as drain line blowout bladders, can also help clear downstream condensate lines and HVAC collection pipes connected to shop drains. If the existing valve shows heavy corrosion, stripped threads, or internal pitting, replace it immediately with a fresh brass ball valve. Reassembling the fitting with fresh thread sealant restores proper drainage capability without risking sudden airline leaks.
Long-Term Storage Procedures and Tank Integrity Verification
Preparing an air compressor for seasonal storage or extended downtime requires special attention to moisture management. After completing the final work project, depressurize the tank completely and drain every drop of liquid from the bottom port. For winter storage in unheated garages, leave the drain valve cracked slightly open to prevent condensation from forming during drastic temperature swings. Allowing ambient air to circulate freely through the open drain port prevents trapped vapor from condensing against cold internal steel walls.
Routine structural inspection of the receiver tank should accompany every seasonal maintenance routine. Examine the exterior bottom surface of the tank, paying close attention to welded seams and areas around mounting brackets. Look for warning signs such as blistered paint, flaking rust, or small weeping moisture droplets that indicate deep metal corrosion. If a tank develops external rust pitting or pinhole leaks, the vessel is structurally compromised and must be decommissioned immediately to prevent hazardous rupture.
Combining consistent drainage practices with periodic safety checks ensures years of reliable pneumatic power. Always test the ring on the ASME safety relief valve periodically to confirm that the spring mechanism operates smoothly without binding. Inspect downstream regulator filters and water separators to verify that dry, clean air reaches your pneumatic equipment. Adopting an accessible drain valve upgrade and adhering to a strict draining schedule keeps your compressor running safely and efficiently across every project.
About the author
Bob Beacham is an experienced tools and workshop writer with deep knowledge of power equipment, mechanical systems, and practical DIY applications. His coverage of air compressors, welding equipment, saws, and workshop tools helps translate technical specifications into useful guidance for homeowners and serious DIYers.